Ubiquitin Immunoprecipitation Background Reduction: A Strategic Guide for Cleaner Pull-Downs and Reliable Data
This article provides a comprehensive framework for researchers and drug development professionals to systematically minimize background in ubiquitin immunoprecipitation (IP) experiments.
Ubiquitin Immunoprecipitation Background Reduction: A Strategic Guide for Cleaner Pull-Downs and Reliable Data
Abstract
This article provides a comprehensive framework for researchers and drug development professionals to systematically minimize background in ubiquitin immunoprecipitation (IP) experiments. Covering foundational principles to advanced validation techniques, it details the critical roles of controls, optimized lysis conditions, bead selection, and antibody choices. The guide further explores specialized methodologies like TUBEs for stabilizing ubiquitinated proteins and offers targeted troubleshooting for common issues such as non-specific binding and epitope masking. By integrating these strategies, scientists can significantly enhance the specificity and reproducibility of their ubiquitin IPs, thereby improving the reliability of downstream analyses in both basic research and therapeutic development.
Understanding Ubiquitin IP Fundamentals and Sources of Background Noise
Core Principles of Ubiquitin Immunoprecipitation and Common Formats (IP, Co-IP, Pull-down)
Core Principles and Key Concepts
What is the fundamental principle behind Ubiquitin Immunoprecipitation?
Ubiquitin Immunoprecipitation (Ub-IP) is a technique used to isolate ubiquitinated proteins from complex biological samples. The principle relies on using highly specific antibodies to precipitate the target protein and its ubiquitin conjugates. Subsequently, the precipitated complexes are analyzed via protein electrophoresis and immunoblotting to detect ubiquitin modification. A key indicator of successful ubiquitination is the appearance of bands at higher molecular weights on a Western blot, representing the target protein with attached ubiquitin chains [1].
How does Co-Immunoprecipitation (Co-IP) differ from standard IP?
While standard IP aims to purify or enrich a single protein target, Co-Immunoprecipitation (Co-IP) is specifically designed to isolate protein complexes. The key distinction is that in Co-IP, proteins associated with the antigen are co-precipitated along with the primary target. This makes Co-IP a powerful method for analyzing multiple protein interactions and their functions. The choice of antibody is critical for successful Co-IP, as it must bind to the surface of the complex without disrupting the weak interactions that often hold protein complexes together [2] [3].
When should I choose a pull-down assay over Co-IP?
Pull-down assays are conceptually similar to Co-IPs but do not use antibodies and are therefore not immunoassays. Instead, the bait protein itself is immobilized directly to a bead. Pull-downs are often the preferred choice when working with tagged recombinant proteins, as an N- or C-terminal tag is readily available for binding and is unlikely to interfere with complex formation. In contrast, Co-IP with endogenous antibodies risks the epitope being buried upon complex formation, which can interfere with the interaction [2] [3].
Comparison of Common Affinity Capture Methods
| Method | Target | Purpose | Key Applications |
|---|---|---|---|
| IP | Known single protein | Purifying/enriching a single protein | Enrichment for WB analysis, study PTMs, epitope mapping, protein removal from lysate [3] |
| Co-IP | Protein complexes | Protein-protein interactions | Discover new interactions, prove bait-prey interaction, map interaction networks, understand dynamic interactions [3] |
| Pull-down | Protein complexes | Protein-protein interactions | Similar to Co-IP but uses tagged bait protein instead of antibodies; avoids antibody interference issues [3] |
Troubleshooting Guides
How can I reduce high background in my Ubiquitin IP experiments?
High background from unspecific protein binding is a common challenge in IP assays. These background proteins often unfold during cell lysis and bind non-specifically to affinity beads via exposed hydrophobic patches [4].
Strategies to Minimize Background:
- Pre-clearing with Control Beads: Use binding control beads (plain beads without coupled antibody or Nanobody) to pre-clear your lysate. Incubate lysate with these beads for 30 minutes at 4°C before proceeding with your IP. This removes proteins that non-specifically bind to the bead matrix itself [4].
- Optimize Wash Stringency: Increase the number and length of washing steps. Consider adding detergents (e.g., 0.1% Triton X-100) or increasing salt concentration (150-500 mM NaCl) to your wash buffer. This is particularly effective when using highly stable capture reagents like GFP-Trap, which can withstand harsh conditions [4].
- Limit Incubation Time: Prolonged incubation times (exceeding 60 minutes at 4°C) can promote protein unfolding and aggregation, leading to higher background. Since binding reactions are often complete within 30 minutes, extended incubation does not improve yield but increases background [4].
- Use Clean Consumables: Transfer affinity beads to a new tube during the final wash step to avoid eluting off-target proteins bound to the tube surface. Always use new tips and low-binding tubes [4].
- Bead-Only and Isotype Controls: Include a bead-only control (beads without antibody) to identify non-specific bead-protein interactions. An isotype control (non-specific antibody of the same isotype) helps identify background caused by protein binding to the IgG itself [5].
Why am I getting no signal or low signal in my Co-IP?
The absence of expected bands can result from several issues, with lysis buffer choice being a primary culprit [5].
Troubleshooting Low/No Signal:
| Problem | Possible Cause | Solution |
|---|---|---|
| No Co-IP Signal | Protein-protein interactions disrupted by stringent lysis conditions [5] | Avoid strong denaturing buffers like RIPA (which contains sodium deoxycholate). Use milder lysis buffers (e.g., Cell Lysis Buffer) that preserve native protein complexes [5]. |
| Low Protein Expression | Target protein expressed below detection levels [5] | Verify protein expression in your cell/tissue type using expression databases (BioGPS, Human Protein Atlas). Include a positive control lysate [5]. |
| Epitope Masking | Antibody binding site obscured by protein conformation or interacting proteins [5] | Use an antibody that recognizes a different epitope on the target protein. For tagged proteins, ensure the tag is accessible [2]. |
| Low Ab-Bead Binding | Suboptimal bead choice for antibody host species [5] | Use Protein A beads for rabbit antibodies and Protein G beads for mouse antibodies for higher affinity. Combination Protein A/G beads can also be helpful [5]. |
| Transient Interactions | Weak or transient interactions not captured [3] | Co-IP may not detect low-affinity interactions. Consider cross-linking or alternative validation methods [3]. |
How do I prevent the IP antibody from obscuring my target band in Western blots?
A common issue occurs when the denatured heavy (~50 kDa) and light (~25 kDa) chains of the IP antibody are detected by the Western blot secondary antibody, obscuring target proteins of similar molecular weights [5].
Solutions to Avoid IgG Masking:
- Different Species for IP and WB: Use primary antibodies from different host species for the IP and the Western blot (e.g., rabbit for IP, mouse for WB, with species-specific secondary antibodies) [5].
- Biotinylated Antibodies for WB: Use a biotinylated primary antibody for Western blot detection with Streptavidin-HRP, which will not cross-react with the denatured IP antibody [5].
- Light-Chain Specific Secondaries: Use light chain-specific secondary antibodies, which result in a band only at 25 kDa, clearing the 50 kDa region [5].
- HRP-DirecT System: Use systems like the HRP-DirecT series, where the co-eluted IP antibody is not detected in the Western blot, which is especially useful when the target protein overlaps with the heavy or light chain bands [2].
Frequently Asked Questions (FAQs)
What are the key considerations for lysis buffer in Co-IP?
The lysis buffer is one of the most critical technical aspects. For Co-IP experiments, you must use a non-denaturing or mild lysis buffer to preserve protein-protein interactions. Strong denaturing buffers like RIPA (which contains ionic detergents like sodium deoxycholate) can disrupt protein complexes and should be avoided. The buffer should effectively solubilize proteins while maintaining native conformations and interactions. Always add protease and phosphatase inhibitors immediately before use to prevent protein degradation during preparation [5] [6].
How can I confirm that my ubiquitin bands are specific?
Specific ubiquitin bands typically appear as smears or discrete bands at higher molecular weights than the non-modified protein. To confirm specificity:
- Include Appropriate Controls: Use a bead-only control and an isotype control to identify non-specific binding [5].
- Validate with Input Lysate: Always reserve 1-10% of your starting lysate as an "input" control. This confirms the presence of both the bait and prey proteins in your sample before IP [3].
- Confirm with Functional Assays: Complex formation identified by Co-IP should be confirmed by other methods, such as protein interaction analysis using fluorescent-labeled proteins or mass spectrometry [2].
What are the advantages of using tagged proteins for IP?
Tagging your protein of interest with epitopes like FLAG, HA, c-Myc, or V5 provides several advantages [3]:
- Reliable Antibody Binding: Anti-tag antibodies are highly specific and readily available, with their epitope predictably located at the terminal of your protein [2].
- Minimized Interference: The tag is unlikely to interfere with complex formation, unlike antibodies for endogenous proteins which might bind at the interaction site [2].
- Standardization: The same high-affinity anti-tag antibody can be used for multiple different bait proteins, standardizing your IP protocol [3].
The main disadvantage is that overexpression of recombinant tagged proteins can sometimes lead to artifactual results, and the tag itself could potentially affect protein function or localization [2].
Experimental Workflows and Visualization
Standard Co-IP Workflow
Optimized Ubiquitin IP Workflow with Background Reduction
The Scientist's Toolkit: Essential Research Reagents
Key Research Reagent Solutions for Ubiquitin IP
| Reagent Category | Specific Examples | Function/Purpose |
|---|---|---|
| Lysis Buffers | Non-denaturing Cell Lysis Buffer [5] | Extracts soluble proteins while preserving protein-protein interactions and native complexes. |
| Protease Inhibitors | Protease/Phosphatase Inhibitor Cocktails [5] | Prevents protein degradation during sample preparation; essential for maintaining ubiquitination states. |
| IP Beads | Protein A/G Agarose/Magnetic Beads [2] [7] | Solid support for antibody immobilization; magnetic beads reduce mechanical stress on complexes [7]. |
| Tagged Protein Purification | GFP-Trap, Anti-FLAG, Anti-HA Beads [2] [4] | High-affinity capture of specific tagged proteins; offers standardized approach with minimal epitope masking. |
| Positive Controls | Known ubiquitinated proteins, Input lysate samples [5] | Verifies experimental workflow and antibody functionality; essential for troubleshooting. |
| Negative Controls | Binding control beads, Isotype control antibodies [4] [5] | Identifies non-specific binding to beads or antibodies; critical for background reduction. |
| Detection Reagents | HRP-DirecT, Light-chain specific secondary antibodies [2] [5] | Enables detection without interference from IP antibody heavy/light chains on Western blots. |
| Wash Buffer Additives | NaCl (up to 2M), Triton X-100 (up to 1%), Urea (up to 8M) [4] | Increases stringency to remove non-specifically bound proteins while maintaining specific interactions. |
Frequently Asked Questions
What are the primary causes of high background in ubiquitin immunoprecipitation (IP) experiments? High background is frequently caused by non-specific binding (NSB) of proteins to beads or the solid support, antibody cross-reactivity with off-target proteins, and protein aggregation that leads to non-specific co-precipitation. Ensuring proper antibody validation and effective blocking are key to mitigation [8] [9].
How can I confirm my antibody's specificity for my target ubiquitinated protein? Knock-out (KO) validation is a highly trusted method. Test your antibody in a wild-type cell line and a KO cell line that does not express your target protein. A specific antibody will produce a signal in the wild-type cells and no signal in the KO cells [9].
My secondary antibody is creating a high background. What should I check? Cross-reaction can occur if the enzyme-labeled secondary antibody interacts with proteins in your sample [8]. Ensure the secondary antibody is raised against the host species of your primary antibody and is validated for your specific application (e.g., western blot, ELISA). Using a pre-adsorbed secondary antibody can also reduce cross-species reactivity.
Does the choice of microplate matter for immunoassays like ELISA? Yes. The binding characteristics of your microplate (e.g., high-binding vs. medium-binding) can significantly impact NSB. Testing different plate types during assay development is recommended to identify the one that minimizes background for your specific assay [8].
What is the best blocking agent to prevent NSB? There is no universal best blocker; the optimal choice depends on your specific antibody and sample. Common blockers include Bovine Serum Albumin (BSA), casein, non-fat dry milk, and fish gelatin. You should empirically test different blockers to find the most effective one for your system [8].
Troubleshooting Guide: Identifying and Resolving Common Issues
Problem 1: High Background Signal in Western Blot or ELISA
| Potential Cause | Investigation Method | Recommended Solution |
|---|---|---|
| Insufficient blocking | Compare signal intensity with increased blocker concentration or incubation time. | Test different blocking agents (e.g., BSA, casein, non-fat dry milk) [8]. |
| Antibody cross-reactivity | Perform a knock-out (KO) validation control [9]. | Use a KO-validated primary antibody. If cross-reactivity is confirmed, switch to a different, validated antibody. |
| Non-specific secondary antibody | Run a control without the primary antibody. | Use secondary antibodies that are pre-adsorbed against proteins from your sample species. |
| Protein aggregation | Centrifuge lysate at high speed before IP. | Always pre-clear your lysate and include appropriate detergents (e.g., Triton X-100) in buffers. |
Problem 2: Non-Specific Bands in Western Blot
| Potential Cause | Investigation Method | Recommended Solution |
|---|---|---|
| Antibody recognizes unrelated proteins | Check antibody datasheet for known cross-reactivity. Perform KO validation [9]. | Use a monoclonal or recombinant antibody for higher specificity [9]. |
| Incomplete denaturation | Ensure sample buffer contains fresh reducing agent and boil samples properly. | Follow a standardized sample preparation protocol to ensure complete denaturation. |
| Protein degradation | Freshly add protease inhibitors to lysis buffer. | Run a new gel with a freshly prepared lysate. |
Problem 3: Irreproducible Results in Immunoprecipitation
| Potential Cause | Investigation Method | Recommended Solution |
|---|---|---|
| Batch-to-batch antibody variation | Compare results using antibodies from different lot numbers. | Use recombinant antibodies, which offer minimal batch-to-batch variation [9]. |
| Non-specific binding to beads | Include a control with beads and no antibody. | Use control IgGs from the same host species and change bead types (e.g., magnetic vs. agarose). |
| Variable washing stringency | Standardize wash buffer composition, volume, and incubation time. | Increase the number of washes or add mild detergents (e.g., Tween-20) to wash buffers [8]. |
Experimental Protocols for Key Validation Experiments
Protocol 1: Knock-Out Validation for Antibody Specificity
This protocol is critical for confirming that an antibody signal is specific to the target protein [9].
- Cell Culture: Maintain wild-type (WT) and target gene knock-out (KO) cell lines under standard conditions.
- Lysate Preparation:
- Lyse both WT and KO cells using an appropriate RIPA buffer supplemented with protease inhibitors and a deubiquitinase inhibitor (e.g., N-Ethylmaleimide).
- Centrifuge lysates at 14,000 x g for 15 minutes at 4°C.
- Transfer the supernatant to a new tube and determine protein concentration using a BCA assay [8].
- Western Blotting:
- Load equal amounts of WT and KO protein lysates onto an SDS-PAGE gel.
- Transfer to a PVDF membrane and block with 5% BSA or non-fat dry milk.
- Incubate with the primary antibody of interest.
- Incubate with an HRP-conjugated secondary antibody.
- Develop the blot with chemiluminescent substrate.
- Interpretation: A specific antibody will produce a band at the expected molecular weight in the WT lane and no band in the KO lane. Any bands present in the KO lane indicate non-specific cross-reactivity.
Protocol 2: Comparing Blocking Agents to Minimize NSB
This protocol helps identify the optimal blocking agent for your immunoassay [8].
- Plate Coating: Coat a microplate with your target antigen or a non-specific protein.
- Blocking: Divide the plate and block different wells with various blocking solutions (e.g., 1-5% BSA, casein, non-fat dry milk, fish gelatin) for 1-2 hours.
- Antibody Incubation: Incubate with your primary antibody, followed by a labeled secondary antibody.
- Signal Detection: Develop the assay and measure the signal.
- Analysis: The optimal blocker delivers the highest signal-to-noise ratio (specific signal in antigen-coated wells divided by background signal in non-specific protein-coated wells).
The Scientist's Toolkit: Research Reagent Solutions
| Reagent / Material | Function & Explanation |
|---|---|
| Recombinant Monoclonal Antibodies | Antibodies produced via synthetic genes offer superior specificity, low batch-to-batch variation, and a secured long-term supply, which is crucial for reproducible results [9]. |
| Knock-Out (KO) Cell Lysate | Serves as a critical negative control to empirically test an antibody's specificity by confirming the absence of signal in cells lacking the target protein [9]. |
| Protease & Deubiquitinase Inhibitors | Added to lysis buffers to prevent the degradation of ubiquitinated proteins and to preserve the ubiquitination state of your target during sample preparation. |
| High-Binding & Medium-Binding Plates | Different microplates have varying capacities to passively bind proteins. Testing both types is essential for optimizing your specific immunoassay and minimizing NSB [8]. |
| Pre-adsorbed Secondary Antibodies | These secondary antibodies have been adsorbed against serum proteins from multiple species, drastically reducing cross-reactivity and resulting in a cleaner background [9]. |
Experimental Workflow and Signaling Pathway Diagrams
The following diagrams outline the core concepts and experimental workflows discussed in this guide.
Troubleshooting Logic for High Background
Ubiquitination Regulation of Protein Homeostasis
Why are controls critical for my ubiquitin immunoprecipitation experiment?
Immunoprecipitation (IP) experiments, including those for ubiquitin, are powerful for enriching specific proteins or protein complexes from a complex mixture. However, they are susceptible to non-specific binding and false positives. Proper controls are not optional; they are essential for verifying that your results are specific and meaningful. They allow you to distinguish true signal from background, confirm the specificity of your antibody, and ensure your target protein was present in the starting material. Without these controls, interpreting your data correctly is nearly impossible [10] [11].
The table below outlines the three essential controls for a robust IP experiment.
| Control Type | What It Detects | Interpretation of a Positive Result (a band appears) |
|---|---|---|
| Input Lysate [10] | Verifies the presence and detectable expression level of the target protein in your sample. | This is a positive control. A band confirms your sample and detection antibodies are valid. |
| Bead-Only Control [10] [12] | Non-specific binding of proteins to the beads (agarose/magnetic) themselves. | Any band indicates your target is sticking to the beads non-specifically. Pre-clearing the lysate may be necessary. |
| Isotype (IgG) Control [10] [12] [13] | Non-specific binding of proteins to the constant region (Fc) of the antibody isotype used. | A band indicates non-specific interaction with the antibody's IgG. The signal in your experimental IP is not specific. |
The following workflow diagram illustrates how these controls integrate into a typical ubiquitin IP experiment.
Troubleshooting Guide: Using Controls to Solve Common Problems
My experimental IP shows a band, but so does my isotype control. What does this mean?
This is a classic sign of non-specific binding. The signal in your experimental IP is not due to the specific interaction of your ubiquitin antibody with its target. Instead, proteins are binding non-specifically to the IgG portion of the antibody [12].
- Possible Cause: The antibody concentration used for the IP may be too high, leading to increased non-specific interactions.
- Solution: Perform an antibody titration to determine the optimal signal-to-noise ratio. Test a range of antibody concentrations (e.g., 1–10 µg per 500 µg of protein extract) to find the concentration that gives a strong specific signal with minimal background in the isotype control [13]. Ensure the concentration of your isotype control antibody matches the concentration of your primary IP antibody for an accurate comparison [12].
I see a band in my bead-only control. What is the issue?
A band in the bead-only control indicates that your target protein is sticking non-specifically to the beads, independent of any antibody [10] [12].
- Possible Cause: The bead material itself has a high binding capacity for various proteins in your lysate.
- Solution: Pre-clearing your lysate can help reduce this background. Incubate your lysate with the beads alone for 30–60 minutes at 4°C before using it for the actual IP experiment. This step allows non-specific proteins to bind to the beads, which are then removed [10].
I see no band in my experimental IP or my input control. What should I check?
This indicates a fundamental problem with either your sample or your detection system.
- Possible Cause 1 (Input is blank): The target protein is not expressed in your sample, or your detection antibody for the western blot is not working.
- Solution: Use expression profiling tools or scientific literature to confirm your cell or tissue type expresses the target protein. Include a known positive control sample to confirm your detection antibodies are functional [10].
- Possible Cause 2 (Input has a band, IP does not): The IP antibody may not be compatible with the native, folded conformation of the protein, a phenomenon known as epitope masking [10]. Alternatively, the lysis conditions may be too harsh and disrupting the protein complex you are trying to capture.
- Solution: For epitope masking, try an antibody that recognizes a different epitope on the target protein [10]. For ubiquitin IP, a denaturing lysis buffer is often used to disrupt protein interactions and preserve the ubiquitin modification. Ensure you are using a lysis buffer and protocol appropriate for your experimental goal (native complex vs. post-translational modification) [14] [11].
I see multiple bands in my experimental IP. How can I tell which is specific?
Multiple bands can be caused by specific biological phenomena or non-specific artifacts.
- Possible Cause 1 (Biological): The bands could represent different protein isoforms, splice variants, or post-translational modifications (like ubiquitination itself, which can create smears or ladders) of your target protein [10].
- Solution: Check the input lysate control. If the same multiple bands appear in the input, they are likely real and related to the antibody's specificity or the biology of the protein. Refer to the antibody datasheet or databases like UniProt or PhosphoSitePlus to see if multiple isoforms or known modifications are expected [10].
- Possible Cause 2 (Non-specific): The extra bands are due to non-specific proteins binding to the IP components.
- Solution: Compare your experimental IP to the bead-only and isotype controls. Bands that appear in the experimental IP but are absent from both negative controls are your specific targets [10] [13].
The Scientist's Toolkit: Essential Reagents for Ubiquitin IP
The table below lists key reagents and their functions, with special considerations for successful ubiquitin immunoprecipitation.
| Reagent / Tool | Critical Function | Key Considerations for Ubiquitin IP |
|---|---|---|
| Lysis Buffer [10] [14] | Solubilizes proteins while preserving the interaction or modification of interest. | For studying ubiquitination, a denaturing lysis buffer is often preferred as it efficiently disrupts protein complexes, inhibits deubiquitinases, and preserves the ubiquitin modification [14]. |
| Protease/Phosphatase/Deubiquitinase Inhibitors [10] [14] [13] | Prevents protein degradation and maintains post-translational modifications during lysis. | Essential. Must include a deubiquitinase inhibitor in the lysis buffer to prevent the removal of ubiquitin from your target protein during sample preparation [14]. |
| Ubiquitin-Trap Agarose [15] | A specialized affinity matrix for highly efficient pull-down of ubiquitin and ubiquitinated proteins. | Uses a nanobody with high affinity for ubiquitin. Advantages include no contaminating heavy/light chains in western blots and compatibility with stringent washes, leading to cleaner results [15]. |
| Magnetic or Agarose Beads [11] | The solid support for immobilizing the antibody and capturing the target. | Both perform similarly. Choose Protein A or G beads based on the host species of your IP antibody. For ubiquitin-trap kits, the beads are already conjugated [11] [15]. |
| Validated IP Antibody [11] | Binds specifically to the target protein (ubiquitin or a ubiquitinated protein). | Must be validated for IP. For co-IP of ubiquitin-binding complexes, use non-denaturing conditions. For direct ubiquitin IP, a denaturing-compatible antibody or ubiquitin-trap is best [11]. |
| Isotype Control Antibody [12] | Matches the class and species of the IP antibody but lacks specific binding; critical for negative control. | Must be used at the same concentration as the primary IP antibody. Example: Use Rabbit (DA1E) mAb IgG XP Isotype Control #3900 for rabbit monoclonal antibodies [12]. |
FAQ: Optimizing Your Ubiquitin IP
What is the single most important step for preserving ubiquitin signals in my IP?
The inclusion of a deubiquitinase (DUB) inhibitor in your lysis buffer is critical. Ubiquitination is a highly dynamic modification, and active DUBs in the lysate will rapidly remove ubiquitin from your target protein, leading to false-negative results. Using a specialized lysis system containing a DUB inhibitor is recommended for optimal preservation of the ubiquitin modification [14].
My target protein runs at the same molecular weight as the antibody light chain (~25 kDa). How can I detect it?
This common problem, known as antibody masking, occurs when the denatured heavy and light chains of the IP antibody are detected by the secondary antibody in the western blot, obscuring your target [10].
- Solution 1: Use antibodies from different species for the IP and the western blot (e.g., rabbit for IP, mouse for WB) along with species-specific secondary antibodies that do not cross-react [10].
- Solution 2: Use a biotinylated primary antibody for the western blot, followed by detection with Streptavidin-HRP [10].
- Solution 3: Use a light-chain specific secondary antibody for the western blot, which will not detect the denatured heavy chain of the IP antibody [10].
Impact of Ubiquitin Chain Linkage Diversity (K48, K63) on Experimental Design and Specificity
FAQs: Core Concepts and Troubleshooting
Q1: What are the primary functional differences between K48 and K63-linked ubiquitin chains that I must consider when designing my experiment?
K48 and K63-linked ubiquitin chains direct substrate proteins to distinct cellular fates, which is a fundamental consideration for experimental design.
- K48-linked chains are the canonical signal for proteasomal degradation [16] [17]. Intracellular degradation studies show that a chain of at least three ubiquitins (K48-Ub3) is the minimal efficient signal, with degradation occurring rapidly, having a half-life of approximately 1-2 minutes in various mammalian cell lines [18].
- K63-linked chains are primarily associated with non-degradative signaling roles, including DNA damage repair, endocytosis, intracellular trafficking, inflammation, and autophagy [19] [17]. During oxidative stress, K63 chains accumulate in non-cytosolic compartments to mediate stress response pathways [20].
The table below summarizes the key functional differences.
| Feature | K48-Linked Chains | K63-Linked Chains |
|---|---|---|
| Primary Function | Targeting to the 26S proteasome for degradation [16] [17] | Non-degradative signaling (e.g., endocytosis, inflammation, DNA repair) [19] [17] |
| Minimal Degradation Signal | K48-Ub3 chain [18] | Not a primary degradation signal |
| Intracellular Degradation Half-Life | ~1-2 minutes (for K48-Ub4-GFP) [18] | Rapidly deubiquitinated rather than degraded [18] |
| Common Conformation | Predominantly compact conformations [16] | Extended, "open" conformations [16] |
Q2: How can I minimize background and ensure specificity in ubiquitin immunoprecipitation experiments?
Background noise in ubiquitin pulldowns often stems from non-specific binding or degradation of the ubiquitin chain bait by deubiquitinases (DUBs) in the lysate.
Use Specific DUB Inhibitors: The choice of DUB inhibitor significantly impacts background and bait stability.
- N-Ethylmaleimide (NEM) is a potent cysteine alkylator that nearly completely blocks chain disassembly but has a higher risk of off-target effects that could alter ubiquitin-binding surfaces [17].
- Chloroacetamide (CAA) is more cysteine-specific but results in partial disassembly of Ub3 to Ub2. Despite this, it effectively enables specific Ub-binding protein enrichment with potentially fewer off-target effects [17].
- Recommendation: Test both inhibitors in your system. For a cleaner interactome, CAA may be preferable, but if complete chain stability is paramount, use NEM.
Validate with Linkage-Specific Controls: Always include known linkage-specific Ub-binding proteins as positive controls for your pulldown. For example, use RAD23B for K48 chains and EPN2 for K63 chains to confirm your experimental conditions are linkage-specific [17].
Account for Conformational Dynamics: Recognize that ubiquitin chains are dynamic and exist in an equilibrium of conformations (e.g., "open" and "closed"). Antibodies and other binding domains often select for pre-existing conformations [16]. This inherent dynamics can influence binding efficiency and must be considered when interpreting pulldown results.
Q3: Why might my experiment with branched K48/K63 ubiquitin chains yield conflicting results, and how should I design it correctly?
Branched K48/K63 chains are a complex signal and do not behave as a simple sum of their linear parts. Conflicting results often arise from a lack of clarity on which chain is attached directly to the substrate.
- The Substrate-Anchored Chain Dictates Fate: Research using the UbiREAD technology reveals a functional hierarchy in branched chains. If a K48 chain is attached to the substrate and a K63 chain branches from it, the complex is treated as a degradation signal. Conversely, if a K63 chain is attached to the substrate with a K48 branch, the complex is rapidly deubiquitinated rather than degraded [18].
- Design for Specificity: When studying branched ubiquitination, you must precisely define and control the architecture of the chain you are investigating. The identity of the chain attached directly to the substrate is a critical variable.
Experimental Protocols
Protocol 1: Ubiquitin Interactor Pulldown with DUB Inhibition
This protocol is designed to identify proteins that bind to specific ubiquitin chain linkages while minimizing DUB-mediated bait degradation [17].
- Bait Preparation: Immobilize purified ubiquitin chains (e.g., K48-Ub3, K63-Ub3) on streptavidin resin via a biotin linker.
- Lysate Preparation: Pre-treat HeLa cell lysate with a DUB inhibitor.
- Option A (CAA): Use 10-20 mM Chloroacetamide.
- Option B (NEM): Use 5-10 mM N-Ethylmaleimide.
- Incubate on ice for 15-30 minutes.
- Pulldown: Incubate the immobilized ubiquitin chains with the inhibited lysate for 1-2 hours at 4°C with gentle rotation.
- Washing: Wash the resin extensively with lysis buffer containing the respective DUB inhibitor to remove non-specifically bound proteins.
- Elution & Analysis: Elute bound proteins using a denaturing buffer (e.g., SDS sample buffer) or by cleaving a specific site in the linker. Identify interactors by liquid chromatography with tandem mass spectrometry (LC-MS/MS).
- Validation: Confirm linkage-specific enrichment using western blot with controls like RAD23B (K48-specific) and EPN2 (K63-specific).
Protocol 2: Detecting Protein Ubiquitination and Activation In Vivo
This protocol outlines steps to detect if a protein of interest is ubiquitinated and how that modification affects its activity in cells [21].
- Cell Preparation and Transfection:
- Plate cells (e.g., HEK293T) in appropriate dishes.
- Co-transfect plasmids expressing your protein of interest, along with plasmids for E1, E2, and a specific E3 ubiquitin ligase (e.g., FBXO45).
- Ubiquitination Detection via Western Blot:
- Lyse cells 24-48 hours post-transfection in a RIPA buffer containing protease inhibitors and a DUB inhibitor (e.g., NEM).
- Perform western blot analysis on the lysates.
- To detect ubiquitinated species, blot with an antibody against your protein of interest. A characteristic smear or ladder at higher molecular weights indicates ubiquitination. Conversely, you can immunoprecipitate your protein and blot with an anti-ubiquitin antibody.
- Functional Assay via CCK-8:
- Plate transfected cells in a 96-well plate.
- At the desired time point, add CCK-8 reagent to the culture medium and incubate for 1-4 hours.
- Measure the absorbance at 450 nm. This serves as a proxy for cellular metabolic activity, which can be used to infer the functional consequence (e.g., activation or inhibition) of the ubiquitination event on your protein's role in cell proliferation/survival.
Pathway and Workflow Diagrams
Ubiquitin Chain Function and Recognition
UbiREAD Experimental Workflow
The Scientist's Toolkit: Research Reagent Solutions
| Reagent / Tool | Function / Application | Key Consideration |
|---|---|---|
| DUB Inhibitors: NEM (N-Ethylmaleimide) | Potent cysteine alkylator; stabilizes ubiquitin chains in lysates by inhibiting DUBs [17]. | High potency but risk of off-target alkylation [17]. |
| DUB Inhibitors: CAA (Chloroacetamide) | More cysteine-specific DUB inhibitor; reduces background in interactor pulldowns [17]. | Milder activity, may allow partial chain disassembly [17]. |
| UbiREAD Technology | Systematically compares intracellular degradation kinetics of substrates with defined ubiquitin chains [18]. | Reveals minimal degradation signal (K48-Ub3) and rapid degradation half-lives (~1 min) [18]. |
| Ubiquiton System | Induces rapid, linkage-specific (M1, K48, K63) polyubiquitylation of a protein of interest in cells [19]. | Uses rapamycin-inducible dimerization to recruit engineered E3 ligases to a target protein [19]. |
| Linkage-Specific DUBs (OTUB1, AMSH) | Used for linkage validation in UbiCRest assays; cleave specific ubiquitin linkages to confirm chain identity [17]. | OTUB1 is K48-specific; AMSH is K63-specific [17]. |
| Branched K48/K63 Ub3 Chains | Tool to study the complex biology of heterotypic ubiquitin signals [18] [17]. | Substrate-anchored chain identity dictates functional outcome (degradation vs. deubiquitination) [18]. |
Optimized Protocols and Advanced Tools for High-Specificity Ubiquitin Enrichment
Troubleshooting Guide: Common Lysis Buffer Issues in Ubiquitination Studies
A poorly optimized lysis buffer is a primary source of high background and failed immunoprecipitation (IP) experiments. The table below outlines common issues, their underlying causes, and recommended solutions tailored for ubiquitin research.
Table 1: Troubleshooting Lysis Buffer Problems for Ubiquitin IP
| Problem | Possible Cause | Discussion & Solution |
|---|---|---|
| Low/No Signal for Ubiquitinated Proteins | Protein-protein interactions disrupted by stringent lysis conditions [22]. | Ionic detergents in RIPA buffer can denature complexes. Use a milder, non-ionic lysis buffer (e.g., NP-40 based) to preserve ubiquitin-protein interactions [23] [22]. |
| High Background & Non-specific Binding | Incomplete lysis or release of DNA; insufficient protease inhibition [24]. | Use brief sonication or DNase I to shear DNA [24] [23]. Always add fresh protease inhibitors to lysis buffer immediately before use to prevent protein degradation [24]. |
| Inconsistent Results Between Samples | Lysis buffer not optimized for specific cell type [24]. | Some cell types require Ca2+ or Mg2+ in wash buffers for optimal protein yield. Adjust buffer composition and assess lysis efficiency under a microscope [24]. |
| Prey protein is detected in input but not in co-IP lane | Lysis buffer is too harsh and disrupting the bait-prey interaction [3] [22]. | The input control confirms the prey protein is present, but the interaction is lost. Switch to a milder lysis buffer and avoid sodium deoxycholate or SDS for co-IP work [3] [22]. |
Frequently Asked Questions (FAQs)
Q1: What is the single most critical factor in lysis buffer choice for co-immunoprecipitation? The choice of detergent is paramount. For co-IP experiments aimed at preserving protein complexes like those involving ubiquitin, non-ionic detergents (e.g., NP-40, Triton X-100) are essential. Ionic detergents (e.g., SDS, sodium deoxycholate), commonly found in RIPA buffers, are highly denaturing and will disrupt protein-protein interactions, leading to false-negative results [23] [22].
Q2: How can I reduce high background in my ubiquitin western blots after IP? High background often stems from non-specific binding to the beads or antibody. Implement these controls:
- Bead-Only Control: Incubate your lysate with bare beads (without antibody) to identify proteins that stick non-specifically to the bead matrix [22].
- Isotype Control: Use a non-specific antibody from the same host species as your IP antibody. This helps distinguish specific binding from background caused by the IgG itself [22].
- Pre-clearing (Optional): Incubating your lysate with beads alone before the IP can help remove proteins that bind non-specifically [23].
Q3: My protein of interest is insoluble. How can I modify the lysis buffer? For insoluble proteins or those in inclusion bodies, you may need to introduce denaturing agents such as urea or guanidine-HCl. These agents help solubilize the protein but will destroy native interactions. This approach is suitable for detecting total ubiquitination levels but not for co-IP of interacting partners [24].
Q4: Why is an "Input" control vital for interpreting my co-IP results? The input lysate (1-10% of your sample saved before IP) serves as a critical quality control. It confirms:
- The presence and expression level of your bait and prey proteins.
- That a negative co-IP result is genuine (prey is present in input but not co-IP) and not due to failed lysis or low protein abundance [3].
Experimental Protocol: Optimized Lysis for Ubiquitin Co-IP
This protocol is designed for the isolation of intact protein complexes under native conditions.
Materials (The Scientist's Toolkit)
Table 2: Essential Reagents for Ubiquitin Co-IP
| Reagent | Function | Example |
|---|---|---|
| Non-Ionic Lysis Buffer | Gently disrupts cell membranes to release soluble proteins while preserving interactions. | NP-40 Lysis Buffer: 150 mM NaCl, 1% NP-40, 50 mM Tris-HCl pH 8.0 [23]. |
| Protease Inhibitor Cocktail | Prevents proteolytic degradation of proteins, crucial for labile modifications like ubiquitin chains. | Add fresh to lysis buffer before use (e.g., ab65621) [24] [23]. |
| Phosphatase Inhibitor Cocktail | Preserves phosphorylation states, which can be important for signaling cascades regulating ubiquitination. | Optional, but recommended for phospho-protein studies (e.g., ab201112) [23]. |
| Protein A/G Agarose/Magnetic Beads | Solid support to capture and precipitate the antibody-antigen complex. | Choose A for rabbit IgG, G for mouse IgG, or A/G for a mix [22]. |
Methodology
- Prepare Cells: Harvest and wash cells with ice-cold PBS. Pellet ~1-3 x 10^7 cells [23].
- Lyse Cells: Resuspend the cell pellet in 300 µL of ice-cold NP-40 lysis buffer, supplemented with fresh protease inhibitors immediately before use [24] [23].
- Incubate: Incubate the suspension on ice for 30 minutes with occasional gentle vortexing [3].
- Clarify Lysate: Centrifuge at 8,000 - 12,000 x g for 10 minutes at 4°C to pellet insoluble debris (e.g., nuclei, cytoskeleton). Transfer the clear supernatant (the whole cell lysate) to a new tube [23].
- Quality Control: Determine protein concentration using a Bradford or BCA assay. Set aside 1-10% of the lysate as your "Input" control [3] [23].
- Proceed to IP: The clarified lysate is now ready for the immunoprecipitation procedure.
Workflow and Decision Diagrams
Diagram 1: Optimal workflow for co-immunoprecipitation experiments where preserving native protein-protein interactions is critical.
Diagram 2: A logical guide to diagnose and resolve the most common issues encountered during co-immunoprecipitation experiments.
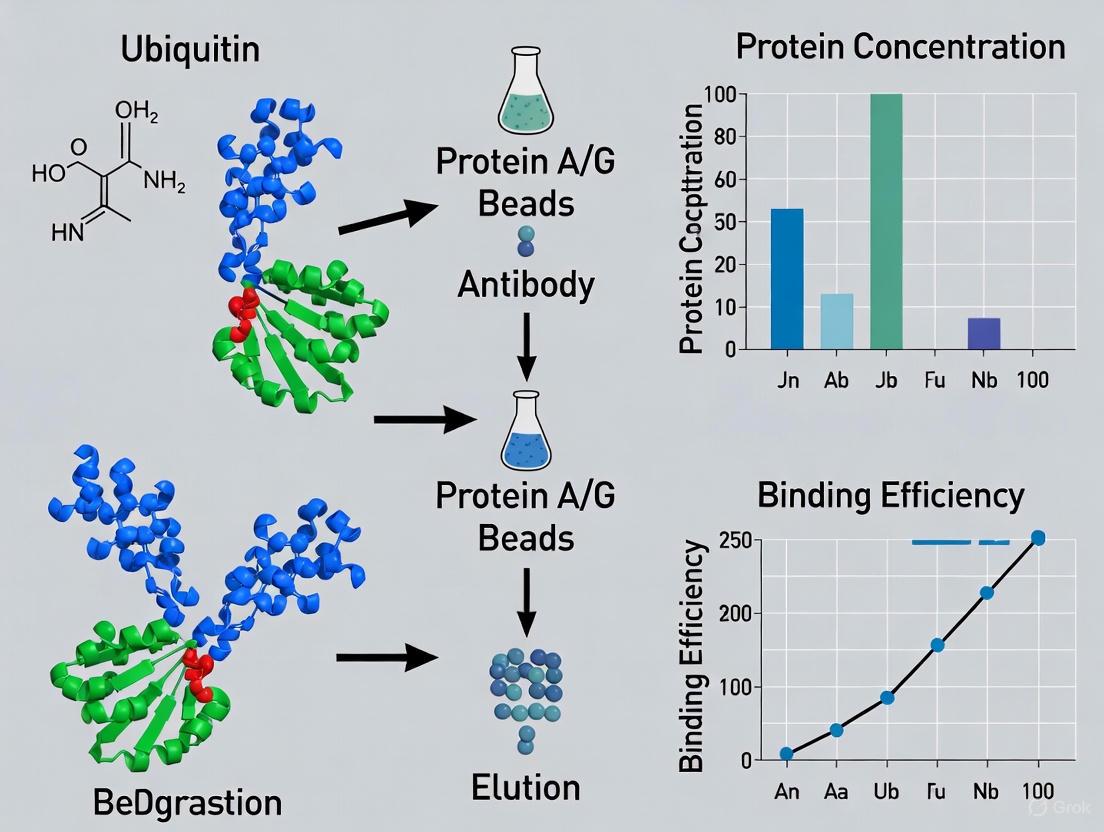
Immunoprecipitation (IP) is a fundamental technique for enriching specific proteins, such as ubiquitin, from complex mixtures using antibodies immobilized on a solid support [25]. The choice of solid support—specifically the type of immunoglobulin-binding protein (Protein A or G) and the bead matrix (traditional agarose vs. magnetic beads)—critically influences the success of your experiment. This is particularly true for challenging targets like ubiquitin, where low abundance and transient modifications demand high sensitivity and low background [26]. This guide provides troubleshooting and FAQs to help you strategically select the right solid support to reduce background and optimize your ubiquitin immunoprecipitation research.
Comparative Data Tables for Solid Support Selection
Table 1: Comparison of Antibody IgG-Binding Proteins
| Feature | Protein A | Protein G | Protein A/G |
|---|---|---|---|
| Native Source | Staphylococcus aureus [27] | Streptococcus [27] | Recombinant fusion [27] |
| Production Source | S. aureus or E. coli [27] | E. coli [27] | E. coli [27] |
| Ig Binding Target | Fc region [27] | Fc region [27] | Fc region [27] |
| Optimal Binding pH | 8.2 [27] | 5 [27] | 5 to 8.2 [27] |
| Key Species and Subclass Specificity | Generally preferred for rabbit, pig, dog, and cat IgG. Binds weakly to some mouse IgG1 antibodies [28] [27]. | Better binding capacity for a broader range of mouse and human IgG subclasses (e.g., IgG1, IgG2) [28] [27]. | Binds the broadest range of IgG subclasses from rabbit, mouse, human, and other mammalian samples [27]. |
Table 2: Magnetic Beads vs. Agarose Beads for Immunoprecipitation
| Parameter | Magnetic Beads | Agarose Beads |
|---|---|---|
| Particle Size | ~1-4 μm [29], 200 nm [30] | 50-150 μm [29] |
| Surface Structure | Smooth, non-porous [31] | Porous, sponge-like [29] |
| Non-specific Binding | Low [31] [32] [29] | Higher [31] [29] |
| Pre-clearing Required | Not required [31] [32] | Often required [31] |
| Handling & Separation | Magnetic rack; simple supernatant removal [31] | Centrifugation; risk of pellet disturbance [31] |
| Protocol Speed | Fast (<40 min to <80 min protocol) [32] | Slower (includes pre-clearing and longer handling) [31] |
| Antibody Consumption | Lower (binding occurs only on outer surface) [31] [32] | Higher (antibodies can trap in pores) [31] [29] |
| Automation Compatibility | High [32] | Low |
Experimental Workflows and Methodologies
Workflow 1: Standard Immunoprecipitation using Magnetic Beads
The following diagram outlines the key steps for a typical magnetic beads-based IP protocol, which is notably faster and requires fewer steps than traditional agarose methods.
Detailed Protocol [32]:
- Bind Antibody to Beads: Incubate your specific antibody with Protein A/G-coupled magnetic beads for approximately 10 minutes at room temperature. Wash to remove unbound antibody.
- Add Protein Sample: Add the prepared cell lysate containing your target protein (e.g., ubiquitinated proteins) to the bead-antibody complex. A 10-minute incubation is often sufficient, but this can be extended to one hour or overnight for low-abundance targets.
- Wash Beads: Place the tube on a magnetic rack to capture the beads. Once the supernatant is clear, remove it. Wash the beads 2-4 times with an appropriate wash buffer to remove non-specifically bound proteins.
- Elute Target Protein: Elute the purified target protein (and co-precipitated partners) from the beads using a low-pH buffer or a denaturing sample buffer for downstream analysis.
Workflow 2: The Ubiquitination Research Pathway
Studying ubiquitination requires an understanding of the enzymatic process and the specific challenges it presents, which informs the choice of solid support.
Key Challenges in Ubiquitination Research [26]:
- Weak Immunogenicity: The small size of ubiquitin (~76 amino acids) means many ubiquitin antibodies are non-specific and bind artifacts.
- Transient and Reversible Modifications: The ubiquitination process is dynamic, leading to a very small percentage of ubiquitinated proteins in a cell lysate, necessitating efficient enrichment.
- Complexity: With over 600 E3 ligases, a single protein can be ubiquitinated by multiple ligases simultaneously, requiring a robust capture reagent.
Frequently Asked Questions (FAQs) & Troubleshooting
Q1: How can I significantly reduce high background in my ubiquitin IP? A: High background is often caused by non-specific protein binding.
- Switch to Magnetic Beads: Their smooth, non-porous surface prevents the trapping of unwanted proteins that is common with porous agarose beads [31].
- Eliminate Pre-clearing: Magnetic bead-based IP does not require a pre-clearing step, which saves time and reduces the loss of your target protein [31] [32].
- Optimize Washes: Perform 2-4 thorough washes with an appropriate buffer while using a magnetic rack to ensure clean separation without disturbing the beads [31].
Q2: My target ubiquitinated protein is of low abundance. How can I improve yield? A: Improving yield for scarce targets involves enhancing enrichment efficiency.
- Use Magnetic Beads for Sensitivity: Magnetic beads are recognized as the most sensitive method for low-abundance proteins and applications like Chromatin IP (ChIP) [32]. This sensitivity is directly applicable to enriching scarce ubiquitinated species.
- Prevent Antibody Loss: The defined surface of magnetic beads ensures all bound antibodies are accessible to the antigen, unlike agarose where antibodies can be trapped internally, maximizing your capture capacity [31] [32].
- Stabilize Ubiquitination: Treat cells with a proteasome inhibitor (e.g., 5-25 µM MG-132 for 1-2 hours) prior to harvesting to prevent the degradation of ubiquitinated proteins and preserve the modification signal in your sample [26].
Q3: Should I choose Protein A, Protein G, or a combined Protein A/G? A: The choice depends on the host species and subclass of your capture antibody.
- Consult Table 1 for detailed specificity. In general:
- Protein G is superior for most mouse and human IgG subclasses [27].
- Protein A/G is a recombinant fusion protein that combines the binding domains of both, offering the broadest recognition profile for antibodies from rabbit, mouse, human, and other mammals. It is an excellent default choice if you are uncertain [27].
Q4: Are magnetic beads cost-effective compared to traditional agarose slurries? A: Yes, when calculated on a per-sample basis, magnetic beads can be cost-effective.
- While the initial container price may be higher, magnetic beads do not require a pre-clearing step, saving half the solid phase that would be used with agarose [31].
- They also result in lower antibody consumption because antibodies are not lost in pores, and the protocol is faster, saving valuable lab time [31] [32].
The Scientist's Toolkit: Key Research Reagent Solutions
| Reagent / Tool | Function & Explanation |
|---|---|
| Protein A/G Magnetic Beads | The core solid support. Combines the broad antibody-binding range of Protein A/G with the low background and handling ease of magnetic beads for high-purity IP [27] [32]. |
| Ubiquitin-Trap (Magnetic Agarose) | A specialized reagent containing an anti-Ubiquitin nanobody (VHH) coupled to beads. Ideal for immunoprecipitating monomeric ubiquitin, ubiquitin chains, and ubiquitinylated proteins with high affinity and low background [26]. |
| Proteasome Inhibitor (e.g., MG-132) | Used during cell harvesting to inhibit the proteasome, thereby preventing the degradation of polyubiquitinated proteins and preserving the ubiquitination signal in your lysate [26]. |
| Magnetic Rack | Essential equipment for separating magnetic beads from solution during wash and elution steps without centrifugation, ensuring minimal bead loss and contamination [29]. |
| Linkage-Specific Ubiquitin Antibodies | Crucial for downstream Western Blot analysis to differentiate the type of polyubiquitin chain (e.g., K48-linked for degradation vs. K63-linked for signaling) pulled down in your IP [26]. |
Employing Tandem Ubiquitin Binding Entities (TUBEs) to Protect Polyubiquitinated Proteins from Deubiquitinases and the Proteasome
Technical FAQ: Core Principles and Applications
What are TUBEs and how do they function in ubiquitin research? Tandem Ubiquitin Binding Entities (TUBEs) are engineered protein reagents containing multiple ubiquitin-binding domains (UBDs) in tandem. They are designed to bind with high affinity (Kds in the nanomolar range) to polyubiquitin chains, enabling specific isolation of polyubiquitylated proteins from complex cell lysates and tissues without requiring immunoprecipitation of overexpressed epitope-tagged ubiquitin or traditional ubiquitin antibodies. Crucially, TUBEs protect ubiquitylated proteins from both deubiquitylating enzymes (DUBs) and proteasome-mediated degradation, even in the absence of conventional inhibitors normally required to block these activities [33].
What specific advantages do TUBEs offer for reducing background in ubiquitin immunoprecipitation? TUBEs address several key sources of experimental background:
- Specificity: They overcome the notoriously non-selective nature of many ubiquitin antibodies, which often leads to artifacts [33].
- Stabilization: By shielding polyubiquitin chains, they prevent deubiquitination and proteasomal degradation during lysate preparation, preserving the native ubiquitinated proteome and reducing degradation-related background signals [33] [34].
- Efficiency: They provide a cost-effective alternative to antibody-based ubiquitin proteomics for large-scale studies [33].
What types of TUBEs are available and how do I choose? TUBEs are available in two primary categories, selection of which depends on your research question:
- Pan-selective TUBEs: Bind to all types of polyubiquitin chains with 1-10 nM affinity [33].
- Chain-selective TUBEs: Bind selectively to specific polyubiquitin linkages, such as K48 (associated with proteasomal degradation), K63 (often signaling roles), or linear M1 chains [33].
Troubleshooting Guide: Common Experimental Issues
Problem: Low Yield of Ubiquitinated Proteins
| Possible Cause | Discussion | Recommendation |
|---|---|---|
| Incomplete Protection from DUBs | Endogenous deubiquitinating enzymes remain active during cell lysis and processing, rapidly removing ubiquitin chains. | Ensure TUBEs are present in the lysis buffer at adequate concentrations immediately upon cell disruption. The recommended affinity is in the nanomolar range (e.g., 1-10 nM) [33]. |
| Proteasomal Degradation | The proteasome continues to degrade ubiquitinated proteins during sample preparation. | Use TUBEs, which are demonstrated to protect against proteasome-mediated degradation [33]. For critical experiments, a combination of TUBEs and proteasome inhibitors (e.g., MG132) can be used [34]. |
| Insufficient TUBE Concentration | The amount of TUBE is insufficient to bind the total pool of polyubiquitinated proteins. | Titrate the TUBE reagent to determine the optimal amount for your specific lysate. Using a TUBE reagent with nanomolar affinity (Kd) is crucial for effective pulldown [33]. |
Problem: High Background or Non-Specific Binding
| Possible Cause | Discussion | Recommendation |
|---|---|---|
| Non-specific Protein Binding to Beads | Proteins may bind non-specifically to the beads (e.g., agarose, magnetic) used to immobilize the TUBEs. | Pre-clear the lysate by incubating with beads alone before adding the TUBE-bead complex. Always include a bead-only control (beads incubated with lysate without TUBE) to identify this background [35]. |
| Stringent Lysis or Wash Conditions | Overly harsh detergents (e.g., SDS, sodium deoxycholate in RIPA buffer) can denature proteins and disrupt specific interactions, while also increasing non-specific binding. | Use a mild, non-denaturing lysis buffer (e.g., Cell Lysis Buffer #9803) for TUBE pulldowns and Co-IPs. Avoid RIPA buffer for these applications. Optimize wash buffer stringency by reducing salt and detergent concentrations if background is high [35] [36]. |
| Carryover of Insoluble Material | Insoluble proteins or cellular debris can precipitate and bind non-specifically. | Centrifuge the lysate at high speed (e.g., 30 minutes) after lysis to remove all debris and membrane fragments before adding it to the TUBEs [36]. |
Problem: Inefficient Pulldown or Weak Signal
| Possible Cause | Discussion | Recommendation |
|---|---|---|
| Low Abundance of Target | The ubiquitinated form of your protein of interest may be expressed at very low levels, below the detection limit. | Increase the amount of starting lysate. Pre-clearing the lysate can also help by removing contaminants that compete for binding [36]. Confirm protein expression and ubiquitination status using positive controls. |
| Antibody Issues in Detection | The primary antibody may not recognize the ubiquitinated form, or the antibody for detection may bind the denatured IP antibody, obscuring the target. | For western blotting, use antibodies from different species for the IP (if using a TUBE with a tag) and the blot. Alternatively, use a biotinylated primary antibody for detection with streptavidin-HRP, or a light-chain specific secondary antibody to avoid heavy/light chain interference [35]. |
| Epitope Masking | The conformation of the ubiquitinated target protein or associated proteins may obscure the antibody's epitope. | If suspected, try an antibody that recognizes a different epitope on the target protein [35]. |
Experimental Protocols
A. Standard Protocol for Pull-Down of Ubiquitinated Proteins Using TUBEs
This protocol outlines the use of TUBE reagents (e.g., LifeSensors UM501M) for the isolation and subsequent analysis of ubiquitinated proteins [33].
Key Research Reagent Solutions
| Reagent/Material | Function | Example/Note |
|---|---|---|
| Pan- or Chain-Selective TUBEs | Core reagent for binding and protecting polyubiquitin chains. | LifeSensors UM501M (pan-TUBE); K48 HF TUBE, K63 TUBE (chain-selective) [33]. |
| Mild Lysis Buffer | To extract proteins without disrupting ubiquitin chains or protein complexes. | Cell Lysis Buffer #9803 is recommended. Avoid RIPA buffer for pull-downs [35]. |
| Protease/Phosphatase Inhibitors | To prevent general protein degradation and maintain phosphorylation states. | Essential, even with TUBE protection. Use commercial cocktails [35]. |
| Protein A/G Beads | To immobilize TUBEs if using tag-specific antibodies for capture. | Choose based on the tag of your TUBE (e.g., Protein A for rabbit IgG tags) [35]. |
| Tag-Specific Antibody | To immobilize tagged-TUBEs onto beads. | Required if TUBE is not pre-conjugated to beads. |
| Elution Buffer | To release captured ubiquitinated proteins from the TUBE-bead complex. | Use standard 2X Laemmli buffer for western blotting, or a gentle glycine buffer for functional studies [36]. |
Methodology:
- Cell Lysis: Lyse cells or tissue in a recommended mild lysis buffer, supplemented with fresh protease and phosphatase inhibitors. Sonication is crucial for complete nuclear rupture and protein extraction [35].
- Clarification: Centrifuge the lysate at high speed (e.g., >12,000 x g) for 15-30 minutes at 4°C. Transfer the supernatant to a new tube.
- Pre-clearing (Optional but Recommended): Incubate the lysate with bare beads for 30-60 minutes at 4°C. Pellet the beads and keep the supernatant to reduce non-specific binding [35] [36].
- Incubation with TUBE-Bead Complex: Add the pre-formed TUBE-bead complex (TUBE bound to beads via its tag) to the clarified lysate.
- Binding: Incubate with gentle rotation for 2-4 hours at 4°C.
- Washing: Pellet the beads and wash 3-4 times with a mild wash buffer (e.g., lysis buffer or PBS with low detergent). Save wash fractions to monitor efficiency if needed [36].
- Elution: Elute the captured proteins by boiling the beads in 2X Laemmli buffer for western analysis, or with a specific competitive eluent (e.g., free ubiquitin) for downstream applications.
B. In-Cell Protection Using TR-TUBE Expression
For enhanced in vivo protection of ubiquitinated substrates, a trypsin-resistant TUBE (TR-TUBE) can be expressed directly in cells [34].
Workflow Diagram: TR-TUBE Experimental Process
Methodology [34]:
- Transfection: Co-transfect cells with plasmids encoding FLAG-tagged TR-TUBE and your ubiquitin ligase of interest.
- Incubation: Allow expression for 24-48 hours. Note that prolonged expression (e.g., >48h) may lead to accumulation of ubiquitin conjugates and some cytotoxicity.
- Cell Lysis: Harvest and lyse cells in a suitable buffer.
- Immunoprecipitation: Use anti-FLAG antibodies to immunoprecipitate the TR-TUBE along with its bound, ubiquitinated substrates.
- Analysis: Analyze the immunoprecipitates by western blotting or mass spectrometry to identify stabilized ubiquitinated proteins.
Advanced Application: Combining TR-TUBE and diGly Antibody Enrichment
For comprehensive identification of ubiquitin ligase substrates, a powerful method combines TR-TUBE expression with anti-diGly remnant antibody enrichment, followed by mass spectrometry [34].
Workflow Diagram: Combined Enrichment Strategy for Substrate Identification
Key Findings and Quantitative Data This approach successfully identified specific substrates for the uncharacterized F-box protein FBXO21. The quantitative data highlights its effectiveness [34]:
| Experimental Condition | Outcome on Substrate-derived diGly Peptides |
|---|---|
| diGly antibody alone | Overexpression of a ubiquitin ligase + proteasome inhibitor did not significantly increase specific diGly peptides above background. |
| diGly antibody + TR-TUBE | In TR-TUBE-expressing cells, the level of substrate-derived diGly peptides produced by the overexpressed ligase was significantly elevated. |
Addressing IgG Heavy/Light Chain Interference in Western Blot Detection
In ubiquitin immunoprecipitation research, detecting your protein of interest on a Western blot can be complicated by the co-elution of the immunoprecipitation (IP) antibody's heavy (~50 kDa) and light (~25 kDa) chains. These chains can obscure or be mistaken for your target protein, especially when studying ubiquitinated species which can migrate at varied molecular weights. This guide provides targeted solutions to eliminate this interference, thereby reducing background and enhancing the reliability of your data.
FAQs and Troubleshooting Guides
Why am I seeing bands at 50 kDa and 25 kDa on my blot?
The bands you see at approximately 50 kDa and 25 kDa are very likely the heavy and light chains of the IgG antibody used for the immunoprecipitation itself [37]. During the standard elution step, the antibody-antigen complex is disrupted, releasing your target protein and the antibody's subunits into the eluate. When this eluate is loaded onto a gel and probed with a detection antibody, the secondary antibody will bind to these IP antibody chains, making them visible [38] [39].
How can I prevent the IP antibody from appearing on my blot?
There are several established methods to prevent the IP antibody from co-eluting and interfering with your detection.
1. Covalent Crosslinking: Chemically crosslink the IP antibody to the beads before incubating with your lysate. This creates a permanent bond, so the antibody remains attached to the beads during elution. Kits like the Pierce Crosslink IP Kit are designed for this purpose [38]. A potential drawback is that the crosslinking process can sometimes alter the antibody's binding sites, reducing its affinity for your target [38].
2. Use an Alternative Detection Strategy: A powerful solution is to use a secondary antibody that is specific only to the light chain (e.g., anti-IgG, Light Chain Specific) for your final Western blot detection. This will reveal the light chain (~25 kDa) but will not detect the heavy chain (~50 kDa), freeing up that region of the blot from interference [39].
3. Species-Matched Antibody Strategy: If possible, perform the IP with an antibody from one host species (e.g., mouse) and then use a primary detection antibody from a different host species (e.g., rabbit) for the Western blot. Subsequently, use a secondary antibody for Western blot detection that is highly cross-adsorbed against the IP antibody species. This minimizes the chance of the Western blot secondary antibody recognizing the denatured IP antibody on the membrane [39].
What should I do if crosslinking reduces my IP efficiency?
If you experience reduced IP efficiency after crosslinking, it is likely because the crosslinking process has altered the antigen-binding sites of your antibody [38]. To address this:
- Consider using a superior covalent coupling kit, such as the Dynabeads Antibody Coupling Kit, which is designed to minimize impact on antibody specificity and affinity compared to traditional crosslinkers [38].
- Alternatively, you can revert to a non-crosslinked IP and rely on the light-chain-specific secondary antibody method for clean detection [39].
My background is still high even after trying these methods. What else can I optimize?
High background is often due to non-specific binding. You can implement more stringent washing conditions to improve your signal-to-noise ratio [38]:
- Add a non-ionic detergent like Tween-20 or Triton X-100 to your wash buffers at a concentration between 0.01% and 0.1% [38].
- Increase the number and duration of your wash steps after the IP incubation [38].
- Ensure your blocking step is effective by using a suitable blocking agent (e.g., BSA or non-fat dry milk) and consider adding the same blocker to your wash buffer [38] [40].
Research Reagent Solutions
The table below summarizes key reagents that can help you overcome IgG chain interference.
| Reagent/Kit | Primary Function | Key Advantage |
|---|---|---|
| Pierce Crosslink IP Kit [38] | Covalently crosslinks antibody to agarose resin. | Prevents co-elution of antibody heavy/light chains. |
| Anti-IgG, Light Chain Specific Secondary Antibody [39] | Detects only antibody light chains on Western blots. | Eliminates heavy chain signal (~50 kDa); ideal for detecting targets near 50 kDa. |
| Clean-Blot IP Detection Reagent [38] | Detects native (non-denatured) antibody on blots. | Does not detect denatured IgG from IP; reduces background. |
| Dynabeads Antibody Coupling Kit [38] | Covalently couples antibodies to magnetic beads. | Minimizes impact on antibody affinity vs. some crosslinkers. |
Experimental Workflow for Clean Detection
The following diagram illustrates a recommended workflow to prevent IgG heavy and light chain interference, integrating the solutions discussed above.
Quantitative Data for Method Selection
To help you choose the most appropriate method, the table below compares the key characteristics of each primary strategy.
| Method | Key Reagent | Effect on Heavy Chain (50 kDa) | Effect on Light Chain (25 kDa) | Relative Experimental Complexity |
|---|---|---|---|---|
| Covalent Crosslinking | Crosslinker (e.g., DSS) or Commercial Kit | Eliminated from blot | Eliminated from blot | High (Additional steps required) |
| Light-Chain Specific Detection | Anti-IgG, Light Chain Specific Secondary Antibody | Eliminated from blot | Remains visible on blot | Low (Simple reagent substitution) |
| Different Species Strategy | Cross-Adsorbed Secondary Antibody | Significantly Reduced | Significantly Reduced | Medium (Requires careful antibody selection) |
Diagnosing and Solving Common Ubiquitin IP Problems for Reproducible Results
How does lysis buffer incompatibility cause low signal in co-immunoprecipitation experiments, and how can I fix it?
The lysis buffer you use is critical for maintaining the native structure of protein complexes. Overly stringent (harsh) lysis buffers can disrupt protein-protein interactions, leading to low or no signal in your co-immunoprecipitation (co-IP) experiments [41].
Problem Explanation: RIPA buffer, which often contains ionic detergents like sodium deoxycholate, is excellent for whole cell extracts for Western blotting but is considered a strong denaturing buffer. It can denature kinases and prevent protein-protein interactions, making it unsuitable for co-IP studies where you need to preserve intact complexes [41]. Milder, non-denaturing lysis buffers are required to maintain these interactions.
Recommended Solutions:
| Solution | Key Reagent/Technique | Rationale |
|---|---|---|
| Use a Mild Lysis Buffer | Cell Lysis Buffer (#9803 from Cell Signaling Technology is cited as an example) [41] | These buffers effectively solubilize proteins while maintaining protein-protein interactions that are crucial for co-IP. |
| Employ Proper Sonication | Tip probe sonicator [41] | Ensures ample nuclear rupture and DNA shearing, leading to greater protein recovery, especially for nuclear and membrane proteins. |
| Include Essential Controls | Input lysate control [41] [3] | Confirms the target protein is present and detectable in your sample and that your IP antibody is working. |
What is epitope masking and what strategies can overcome it to improve IP yield?
Epitope masking occurs when the antibody's binding site on your target protein is obscured. This can happen due to the protein's native conformation or because other interacting proteins are physically blocking the epitope, leading to negative IP results [41].
Solutions for Epitope Masking:
| Strategy | Specific Action | Consideration |
|---|---|---|
| Use an Alternative Antibody | Select an antibody that recognizes a different epitope on the same target protein [41] [6]. | Check the product datasheet for epitope location information. |
| Consider Polyclonal Antibodies | Use a polyclonal antibody (pAb) for the capture step [42]. | pAbs recognize multiple epitopes, increasing the chance of successful capture if one epitope is masked. |
| Utilize Tagged Proteins | Perform IP on a recombinant protein with an affinity tag (e.g., GFP, FLAG, HA) [3] [43]. | Tags are typically exposed and accessible, bypassing epitope masking issues associated with the native protein. |
My target protein has low natural abundance. How can I enhance its detection in ubiquitination studies?
Many proteins, especially those with post-translational modifications like ubiquitination, are expressed at low basal levels. Detecting these requires strategies to enhance signal and preserve the modification [41] [44].
Strategies for Low Abundance Targets:
| Approach | Protocol Detail | Purpose |
|---|---|---|
| Stabilize Ubiquitination | Treat cells with a proteasome inhibitor (e.g., MG-132 at 5-25 µM for 1-2 hours) before harvesting [45]. | Prevents the degradation of ubiquitinated proteins, allowing them to accumulate to detectable levels. |
| Use High-Affinity Enrichment | Employ Ubiquitin-Trap reagents (nanobody-based affinity beads) or linkage-specific ubiquitin antibodies for pulldown [44] [45]. | Provides a robust and specific method to enrich for low-abundance ubiquitinated proteins from complex lysates. |
| Increase Starting Material | Use up to 2 mg of total protein lysate for the IP [3]. | Increases the absolute amount of your target protein in the experiment. |
| Verify Expression | Check expression databases (e.g., BioGPS, The Human Protein Atlas) and always include a known positive control [41]. | Confirms your cell or tissue model expresses the target protein at detectable levels. |
Research Reagent Solutions
The following table lists key reagents and their functions for troubleshooting these common IP issues.
| Reagent Type | Example Products | Function in Experiment |
|---|---|---|
| Mild Lysis Buffer | Cell Lysis Buffer #9803 [41] | Preserves native protein-protein interactions during cell lysis. |
| Proteasome Inhibitor | MG-132 [45] | Stabilizes ubiquitinated proteins by blocking their degradation. |
| High-Affinity Ubiquitin Capture | ChromoTek Ubiquitin-Trap [45] | Efficiently pulls down ubiquitinated proteins for detection. |
| Epitope-Tag Beads | GFP-Trap, Anti-FLAG M2 Affinity Gel [46] [43] | Provides a reliable, standardized method for IP when using tagged proteins. |
| Phosphatase Inhibitors | Sodium orthovanadate, β-Glycerophosphate [41] | Preserves phosphorylation status, which can be crucial for protein function and interactions. |
Experimental Workflow for a Robust Co-IP
The following diagram illustrates a general co-IP workflow that incorporates the troubleshooting strategies discussed above, from sample preparation to analysis.
Ubiquitin Enrichment Strategy Selection
For ubiquitination studies specifically, selecting the right enrichment method is paramount. The diagram below outlines the primary strategies.
In ubiquitin immunoprecipitation (IP) research, high background noise and non-specific bands can compromise data interpretation, particularly when studying specific ubiquitin-like modifiers such as ISG15 or Fubi. Achieving clean results requires meticulous optimization of pre-clearing strategies and rigorous validation of reagent specificity. This guide provides targeted troubleshooting strategies to eliminate non-specific bands, with particular emphasis on pre-clearing techniques and isoform cross-reactivity challenges prevalent in ubiquitination research.
FAQ: Addressing Common Ubiquitin IP Challenges
Non-specific bands in IP experiments typically originate from three major sources [47]:
- Proteins binding non-specifically to affinity beads: Often these are unfolded proteins that expose hydrophobic patches after cell lysis.
- Non-specific interaction with the affinity reagent: This includes antibodies or nanobodies used for precipitation.
- Proteins adhering to plastic consumables: Certain proteins readily bind to tube surfaces, creating background contamination.
In ubiquitin research, additional complexity arises from the structural similarity between ubiquitin and ubiquitin-like modifiers (UBLs). For example, Fubi shares 36% sequence identity and 61% similarity with ubiquitin, potentially leading to cross-reactivity issues with some reagents [48].
How does pre-clearing improve IP results and what controls are necessary?
Pre-clearing removes proteins that bind non-specifically to beads or solid supports before the specific IP, significantly reducing background [49]. This process involves incubating lysates with binding control beads (plain beads without coupled affinity reagent) to adsorb non-specifically interacting proteins [47].
Essential controls for validating pre-clearing efficiency include [50]:
- Isotype control antibodies: To demonstrate specific binding in primary antibody IPs.
- Binding control beads: Plain beads without coupled antibody to identify proteins binding to the bead matrix.
- Comparison of pre-cleared vs. non-pre-cleared lysates: To visualize the effectiveness of non-specific protein removal.
*dot: Pre-clearing Workflow for Reduced Background IP
Experimental Protocols
Standard Pre-clearing Protocol for Agarose Beads
This protocol utilizes binding control beads for effective reduction of non-specific background [47] [49]:
- Cell Lysis: Lyse cells under standard conditions appropriate for your experiment.
- Bead Preparation: Equilibrate binding control beads (e.g., plain agarose beads without coupled nanobody/antibody) in lysis buffer.
- Pre-clearing Incubation: Add binding control beads to cell lysate and rotate end-over-end for 30 minutes at 4°C.
- Bead Separation: Separate beads by centrifugation (2,000-3,000 rpm for 30 seconds) or magnetic separation.
- Lysate Transfer: Transfer the pre-cleared lysate to a new tube for standard IP procedure.
Magnetic Beads Pre-clearing Protocol
For researchers using magnetic separation systems [50]:
- Bead Preparation: Vortex magnetic bead stock tube to resuspend. Transfer 20 μL bead slurry to clean tube.
- Bead Washing: Place tube in magnetic separation rack for 10-15 seconds. Remove buffer once clear. Add 500 μL 1X cell lysis buffer to magnetic bead pellet, vortex briefly to wash. Repeat washing step once more.
- Pre-clearing: Add 200 μL cell lysate to 20 μL pre-washed magnetic beads. Incubate with rotation for 20 minutes at room temperature.
- Separation: Separate beads from lysate using magnetic separation rack. Transfer pre-cleared lysate to clean tube, discard magnetic bead pellet.
Ubiquitin IP Specific Considerations
When working with ubiquitin or UBLs, consider these additional steps:
- Stringent Washes: Incorporate high-salt washes (150-500 mM NaCl) and detergents (0.1% Triton X-100 or 0.05% Nonidet P40 Substitute) to disrupt weak non-specific interactions while maintaining stable ubiquitin-protein complexes [47].
- Incubation Time Optimization: Limit binding incubation time to 30-60 minutes at 4°C to minimize protein unfolding and aggregation that increases background [47].
- Fresh Tubes: Transfer affinity beads to new, low-binding tubes during the final washing step to eliminate proteins stuck to tube surfaces [47].
Optimization Strategies Table
Table 1: Troubleshooting Strategies for Common Non-Specific Band Issues
| Problem | Possible Cause | Solution | Expected Outcome |
|---|---|---|---|
| Multiple non-specific bands | Proteins binding to bead matrix | Pre-clearing with control beads; increase number of washes | Cleaner background with only target bands |
| High background throughout lane | Non-specific binding to affinity reagent | Optimize wash stringency (salt/detergent); use different antibody lot | Reduced general background |
| Bands at antibody heavy/light chains | Antibody co-elution with target | Use cross-reactive secondary antibodies; covalently crosslink antibody to beads | Clear interpretation of low MW targets |
| Inconsistent background between replicates | Protein binding to plastic tubes | Use low-binding tubes; transfer to new tubes during washes | Improved reproducibility |
| Suspected ubiquitin/UBL cross-reactivity | Shared structural motifs | Validate antibody specificity with knockout controls; use tag-based systems | Accurate identification of target |
Table 2: Wash Buffer Compositions for Stringent Ubiquitin IP
| Buffer Component | Compatible Concentration (Agarose Beads) | Compatible Concentration (Magnetic Particles) | Effect on Background Reduction |
|---|---|---|---|
| NaCl | Up to 2 M | Up to 2 M | Disrupts ionic interactions |
| Nonidet P40 Substitute | Up to 2% | Up to 2% | Reduces hydrophobic interactions |
| Triton X-100 | Up to 1% | Up to 1% | Removes membrane-associated proteins |
| Urea | Up to 8 M | Up to 8 M | Denatures and removes loosely bound proteins |
| SDS | Up to 1% | Up to 0.2% | Stringent removal of non-specifically bound proteins |
The Scientist's Toolkit: Essential Research Reagents
Table 3: Key Reagents for Background Reduction in Ubiquitin IP
| Reagent | Function | Application Notes |
|---|---|---|
| Binding Control Beads | Pre-clearing to remove proteins binding to matrix | Use plain beads without coupled antibody/nanobody [47] |
| Protein A/G PLUS Agarose | Antibody binding for target capture | Different binding affinities for various antibody species [49] |
| Magnetic Separation System | Efficient bead recovery with minimal loss | Enables rapid wash steps and buffer changes [50] |
| Isotype Control Antibodies | Specificity controls for IP antibodies | Must be concentration-matched to primary antibody [50] |
| Cross-reactive Secondary Antibodies | Avoid masking by heavy/light chains | Essential for targets near 25kDa or 50kDa [50] |
| Nanobody-based Traps | High-affinity capture of tagged proteins | e.g., GFP-Trap for GFP-tagged ubiquitin constructs [47] |
Advanced Ubiquitin-Specific Considerations
Addressing Isoform Cross-reactivity
The structural similarity between ubiquitin and UBLs presents unique challenges. Recent research reveals that some enzymes, like USP16 and USP36, demonstrate dual ubiquitin/Fubi cleavage activity due to structural recognition mechanisms [48]. When characterizing antibodies or nanobodies for ubiquitin IP:
- Validate with knockout controls: Use CRISPR-modified cell lines lacking specific UBLs to confirm antibody specificity.
- Test cross-reactivity directly: Include recombinant UBLs in validation assays to identify potential cross-reactivity.
- Utilize structure-based reagents: Nanobodies targeting specific domains can provide better specificity, as demonstrated with ISG15-specific nanobodies recognizing distinct epitopes on C- and N-terminal domains [51].
Case Study: Successful Nanobody Characterization
In developing nanobodies for human ISG15, researchers employed comprehensive validation including [51]:
- Nanomolar binding affinity measurements using multiple biochemical assays
- Epitope mapping via NMR and X-ray structural analyses
- Immunoprecipitation applications with minimal background contamination
- Functional characterization in deISGylation assays
This multi-faceted approach ensured specific recognition of the target without cross-reactivity with ubiquitin or other UBLs.
*dot: Sources of Non-Specific Binding in IP Experiments
Eliminating non-specific bands in ubiquitin immunoprecipitation requires systematic optimization of pre-clearing strategies and rigorous validation of reagent specificity. The protocols and troubleshooting guides presented here address the most common challenges researchers face when working with ubiquitin and ubiquitin-like modifiers. By implementing these strategies—particularly effective pre-clearing, stringent wash conditions, and appropriate controls—researchers can significantly reduce background interference and obtain cleaner, more interpretable results for their ubiquitination studies.
Preventing Co-precipitation of Indirect Interactors in Complex Studies
FAQs: Addressing Common Challenges in Ubiquitination Studies
Q1: How can I distinguish a direct ubiquitinated prey from an indirect interactor in my Co-IP? A1: Distinguishing direct from indirect interactions is a central challenge. To address this, you should:
- Use Crosslinking: Consider performing crosslinking prior to co-IP to covalently lock proteins that are in very close proximity, which can help capture direct interactors. However, optimize crosslinking carefully as it can alter antibody affinity [38] [52].
- Employ Stringent Washes: Use wash buffers with increased salt concentration (e.g., 300-500 mM NaCl) or mild, non-ionic detergents (e.g., 0.01-0.1% Tween-20 or Triton X-100) to disrupt weak, transient, or indirect associations without dissolving the specific complex [38] [52].
- Validate with Complementary Techniques: Confirm suspected direct interactions using alternative methods such as pull-down assays with purified recombinant proteins, surface plasmon resonance (SPR), or biophysical techniques [3].
Q2: My negative controls still show background bands. How can I reduce non-specific binding? A2: Persistent non-specific binding requires a multi-pronged approach:
- Optimize Pre-clearing: Pre-clear your lysate with beads alone or with an isotype control antibody to remove proteins that bind non-specifically to the solid support [23].
- Block Beads: Incubate your beads with a blocking agent like 2% BSA before use to cover non-specific binding sites on the bead matrix [52].
- Increase Wash Stringency: As mentioned above, optimize detergent concentration and salt in your wash buffers. You can also increase the number of washes or perform the final wash in a fresh tube to avoid proteins stuck to the tube walls [38] [52].
- Use Affinity-Purified Antibodies: Ensure your IP antibody is affinity-purified to minimize contamination from other immunoglobulins that can cause off-target binding [52].
Q3: What critical controls are non-negotiable for a rigorous ubiquitin Co-IP? A3: Proper controls are the foundation for interpretable results. Your experiment must include:
- Negative Control: Use an isotype control antibody (from the same species as your IP antibody) or perform the IP in a cell line/tissue where your bait protein is knocked out. This identifies proteins that bind non-specifically to the antibody or beads [53].
- Positive Control: Include a known interacting partner to confirm that your co-IP conditions successfully preserve protein interactions [53].
- Input Lane: Reserve 1-10% of your total lysate before the IP. This confirms the presence of both bait and prey proteins in your starting material and serves as a quality control [3].
- Beads-Only Control: Perform the IP procedure with beads but no antibody. This controls for proteins that stick to the bead matrix itself [23].
Troubleshooting Guide: Key Issues and Solutions
The table below summarizes common problems encountered when aiming to reduce co-precipitation of indirect interactors and their potential solutions.
Table 1: Troubleshooting Guide for Preventing Co-precipitation of Indirect Interactors
| Problem Scenario | Root Cause | Recommended Solutions |
|---|---|---|
| Indirect or transient interactors obscure results. | Washes are too gentle, failing to disrupt weak, non-specific, or indirect complexes. | - Optimize wash buffer stringency by increasing salt concentration or adding mild detergents [52].- Perform all steps at 4°C to maintain complex stability while allowing weak interactions to be disrupted [23] [52]. |
| Prey protein is present in the negative control. | The prey protein is denatured or hydrophobic, leading to non-specific sticking to beads, plastic, or the antibody itself. | - Include a pre-clearing step and block beads [52].- Use low-binding plastic consumables [53].- Alter lysis/IP buffer composition (e.g., salt, detergent) to improve prey solubility and health [53]. |
| The IP antibody co-elutes with the antigen, obscuring the target band on the gel. | Standard elution conditions dissociate the antibody-antigen complex. | - Covalently crosslink the IP antibody to the beads to prevent its elution [38].- For western blot detection, use a secondary antibody that only recognizes native (WB) antibody and not denatured (IP) antibody, such as a Clean-Blot reagent [38]. |
| Low abundance of the specific complex makes detection difficult. | The bait protein is expressed at low levels or the interaction is inefficient. | - Consider overexpressing the bait protein to increase the pool of interacting complexes [52].- If the prey is known, try a "reverse co-IP" by immunoprecipitating the prey and blotting for the bait [52]. |
Experimental Workflow & Logic for Minimizing Indirect Interactors
The following diagram outlines a robust experimental workflow designed to minimize the co-precipitation of indirect interactors, incorporating key validation steps.
Diagram 1: A workflow for a Co-IP experiment designed to minimize background and isolate specific interactors.
The Scientist's Toolkit: Essential Reagents for Clean Co-IPs
Table 2: Key Research Reagent Solutions for Ubiquitin Co-IP Experiments
| Reagent / Tool | Function / Purpose | Key Considerations |
|---|---|---|
| Lysis Buffers (e.g., NP-40, RIPA) [23] | To solubilize proteins while preserving native interactions and protein modifications like ubiquitination. | Use the least stringent buffer that gives acceptable yield. NP-40 is gentler; RIPA is harsher and can disrupt some complexes [23]. |
| Protease & Phosphatase Inhibitors [23] | To prevent protein degradation and loss of post-translational modifications (e.g., ubiquitin chains) during sample preparation. | Add inhibitors to the lysis buffer immediately before use. Perform all steps on ice or at 4°C [23] [52]. |
| Magnetic or Agarose Beads | The solid support for immobilizing antibodies and capturing complexes. | Magnetic beads can simplify washing and reduce handling losses. Ensure the bead (Protein A/G) is compatible with your antibody's host species and isotype [38] [52]. |
| High-Specificity Antibodies | The core of the IP to specifically capture the bait protein. | Use antibodies validated for IP/Co-IP. Monoclonal or affinity-purified polyclonal antibodies are preferred to reduce background [52]. |
| Crosslinking Kits (e.g., with DSS or DTBP) [38] | To covalently stabilize protein complexes in situ before lysis, helping to capture transient or weak interactions. | Crosslinking can introduce artifacts. It requires optimization and may not be suitable for all downstream applications like mass spectrometry [38]. |
| Clean-Blot IP Detection Reagent [38] | A secondary reagent for western blotting that detects only the native (non-denatured) antibody, avoiding signal from the denatured IP antibody heavy/light chains. | Essential when the IP antibody's chains co-migrate with your protein of interest on the gel [38]. |
Optimizing Wash Stringency and Elution Conditions to Maximize Signal-to-Noise Ratio
Core Principles: Stringency and Signal-to-Noise
Frequently Asked Questions
What is the primary goal of optimizing wash stringency? The primary goal is to maximize the signal-to-noise ratio (SNR) by promoting specific binding between your target ubiquitinated protein and the antibody, while minimizing non-specific background. High stringency conditions ensure that only perfect matches remain bound during washing. [54]
How is Signal-to-Noise Ratio defined and why is it critical? Signal-to-Noise Ratio (SNR or S/N) compares the level of a desired signal to the level of background noise. A high SNR means the signal is clear and easy to interpret, whereas a low SNR means the signal is obscured by noise. It can be defined as the ratio of signal power to noise power, often expressed in decibels (dB). [55] In the context of ubiquitin immunoprecipitation, a high SNR translates to clean, reliable data with distinct bands and minimal background.
What fundamental factors control stringency in wash buffers? Stringency is primarily controlled by temperature and salt concentration. [54]
- Raise Temperature: Higher temperatures disrupt hydrogen bonds, causing weakly bound or mismatched sequences (or non-specific protein interactions) to dissociate.
- Lower Salt Concentration: Lower salt concentrations reduce hybrid stability by weakening the shielding of electrostatic repulsion between strands (or molecules), making it easier for imperfect matches to dissociate. [54] To increase stringency and detect only specific interactions, you should raise the temperature and lower the salt concentration. [54]
Key Relationships
The following diagram illustrates the core principles of how experimental conditions affect stringency and the final experimental outcome.
Experimental Protocols & Methodologies
Detailed Protocol: A Tiered Washing Approach for Ubiquitin IP
This protocol uses a tiered stringency approach to progressively remove contaminants while preserving specific interactions.
Principle: Begin with low-stringency washes to remove loosely bound contaminants, and progress to high-stringency washes for the most stringent cleanup. The exact buffers can be adapted from commercial microarray systems which operate on similar principles. [56]
Workflow:
- Post-IP Capture: After the ubiquitinated protein has been bound to the antibody-bead complex, pellet the beads and carefully remove the initial binding supernatant.
- Low-Stringency Wash: Resuspend the beads in 500 µL of 1X Wash Buffer A (or equivalent low-salt buffer, e.g., with higher salt ~150-200 mM). Incubate for 5 minutes at room temperature with moderate agitation. Pellet beads and discard supernatant. This step removes excess, unbound probe and loosely associated proteins. [56]
- High-Stringency Wash: Resuspend the beads in 500 µL of 1X Wash Buffer B (or equivalent high-stringency, low-salt buffer). For increased stringency, this wash can be performed at an elevated temperature (e.g., 37°C or 42°C, with pre-warmed buffer). Incubate for 5 minutes with agitation. Pellet beads and discard supernatant. This critical step dissociates mismatched or non-specifically bound complexes. [54] [56]
- Final Rinse: Perform a quick (1-second) dunk or rinse of the beads in 50 mL of a final rinse buffer (1X Wash Buffer C). This buffer is designed to remove components from the previous high-stringency wash that could cause streaks or background during detection. [56]
- Elution: Proceed with your chosen elution method (e.g., low-pH buffer, Laemmli buffer, or competitive elution) to release the purified ubiquitinated proteins for downstream analysis.
Quantitative Guide to Wash Buffer Conditions
Table 1: Adjusting Wash Stringency for Optimization. Use this table to troubleshoot and fine-tune your wash conditions based on initial results.
| Condition Adjustment | Effect on Stringency | Effect on Specific Signal | Effect on Background Noise | When to Use |
|---|---|---|---|---|
| ↑ Temperature | Increases | Preserves (for specific binds) | Decreases | High background, suspect non-specific binding |
| ↓ Salt Concentration | Increases | Preserves (for specific binds) | Decreases | High background, suspect non-specific binding |
| ↓ Temperature | Decreases | May decrease | Increases | Signal is too weak, need milder conditions |
| ↑ Salt Concentration | Decreases | May decrease | Increases | Signal is too weak, need milder conditions |
| Add Detergent (e.g., 0.1% Triton X-100) | Increases (by disrupting hydrophobic interactions) | Preserves | Decreases | Persistent background in clean blots |
Troubleshooting Guides
Common Problems and Solutions
Problem: High Background Noise Across the Entire Membrane or Gel
- Potential Cause: Incomplete washing or insufficient stringency.
- Solution:
- Increase the number of high-stringency washes.
- Optimize your wash buffer by lowering the salt concentration and raising the wash temperature within the stability limits of your target protein. [54]
- Include a mild detergent like 0.1% Triton X-100 or NP-40 in your wash buffers to disrupt hydrophobic non-specific interactions.
Problem: Weak or Absent Specific Signal
- Potential Cause: Wash conditions are too stringent, disrupting the specific antibody-ubiquitin complex.
- Solution:
- Lower the wash temperature (e.g., to room temperature).
- Increase the salt concentration in your wash buffer (e.g., to 150-200 mM NaCl).
- Reduce the number of wash steps or the duration of each wash.
- Verify antibody quality and binding capacity.
Problem: High Electronic Noise in Quantitative Measurements
- Potential Cause: Noise introduced from the measurement device or environment. [57] [58]
- Solution:
- Use signal averaging (multiple scans) if your instrument allows. SNR improves with the square root of the number of scans (n); 4 scans improve SNR by 2x. [57]
- Ensure proper shielding of cables and equipment to reduce environmental electromagnetic noise. [57] [58]
- Use a measurement device with a large dynamic range and high effective number of bits (ENOB). [58]
The Scientist's Toolkit: Essential Research Reagents
Table 2: Key Reagent Solutions for Ubiquitin Immunoprecipitation and Western Blotting
| Item | Function / Purpose | Example / Note |
|---|---|---|
| High-Stringency Wash Buffer | Removes non-specifically bound proteins by disrupting weak interactions. Typically low salt. | Can be based on commercial buffers (e.g., Arrayit Wash Buffer B/Wash Buffer 2) or lab-made low-salt SSC buffer. [56] |
| Low-Stringency Wash Buffer | Removes loosely bound contaminants and excess antibody without disrupting specific binds. Typically higher salt. | Can be based on commercial buffers (e.g., Arrayit Wash Buffer A/Wash Buffer 1) or standard TBS/TBST. [56] |
| Proteasome Inhibitors | Prevents degradation of polyubiquitinated proteins during IP, preserving signal. | MG132 is commonly used. Treatment can increase total and surface expression of ubiquitination targets. [59] |
| Linkage-selective engineered DUBs (enDUBs) | Research tool to selectively hydrolyze specific polyubiquitin linkages (e.g., K48, K63) on a target protein in live cells. | Used for mechanistic studies to decode the function of specific ubiquitin chains. [59] |
| Ubiquitination-Specific Antibodies | Detect polyubiquitin chains or specific linkages (e.g., K48-linked, K63-linked chains). | Essential for confirming successful ubiquitination and for linkage-specific studies via western blot. |
Confirming Specificity and Benchmarking Ubiquitin IP Methodologies
Protein ubiquitination is a crucial post-translational modification that regulates diverse cellular functions, including protein degradation, localization, and activity. The validation of ubiquitination presents significant challenges due to the low stoichiometry of modified proteins, the transient nature of the modification, and the complexity of ubiquitin chain architectures. Within the context of a broader thesis on reducing background in ubiquitin immunoprecipitation research, this technical support center addresses the essential follow-up techniques of Western blotting and mass spectrometry for confirming protein ubiquitination. This guide provides troubleshooting advice and detailed methodologies to help researchers obtain clean, interpretable results while minimizing experimental artifacts.
FAQs: Addressing Common Ubiquitination Validation Questions
What is the fundamental principle behind using Western blot to detect ubiquitination?
Western blot detection of ubiquitination relies on two key principles: (1) ubiquitination causes a significant increase in apparent molecular weight, with mono-ubiquitination adding approximately 8 kDa and polyubiquitination creating even larger shifts; and (2) ubiquitination often generates heterogeneous modified substrates that appear as a characteristic ladder or smear on the blot rather than discrete bands [60]. This molecular weight shift is detectable as a mobility shift when compared to the unmodified protein.
How can I distinguish true ubiquitination signals from non-specific bands?
True ubiquitination typically appears as a high-molecular-weight smear or ladder, while non-specific bands are often discrete. To confirm ubiquitination, researchers can: (1) use proteasome inhibitors like MG-132 to stabilize ubiquitinated species; (2) perform ubiquitin site mapping by mass spectrometry to identify the di-glycine remnant on modified lysines; and (3) combine multiple validation approaches including virtual Western blot analysis that computes molecular weight differences between experimental and expected values [60] [61] [62].
What are the advantages of mass spectrometry over Western blot for ubiquitination validation?
Mass spectrometry provides unambiguous identification of ubiquitination through direct mapping of modification sites by detecting the di-glycine remnant (-GG, mass shift of 114.043 Da) on modified lysine residues [60] [63]. This approach allows for large-scale validation of ubiquitinated proteins, identification of specific ubiquitination sites, and can differentiate ubiquitin chain linkages when combined with appropriate enrichment strategies and advanced fragmentation techniques [64].
Troubleshooting Guide: Western Blot and MS Analysis of Ubiquitination
Table: Common Issues and Solutions in Ubiquitination Detection
| Problem | Possible Causes | Recommended Solutions |
|---|---|---|
| High Background | Antibody concentration too high; Insufficient blocking; Incompatible buffers | Decrease primary/secondary antibody concentration; Extend blocking time (≥1hr RT or overnight at 4°C); Use TBS-based buffers with 0.05% Tween-20 instead of PBS [65] [66] [67] |
| Weak or No Signal | Low ubiquitination levels; Inefficient transfer; Epitope masking | Pre-treat cells with proteasome inhibitors (e.g., 5-25 μM MG-132 for 1-2 hours); Verify transfer efficiency with reversible protein stains; Optimize protein load (20-30 μg for cell lysates, up to 100 μg for modified targets) [66] [62] |
| Multiple Non-specific Bands | Protein degradation; Antibody cross-reactivity; Excessive protein load | Use fresh protease inhibitor cocktails; Validate antibody specificity with appropriate controls; Reduce amount of protein loaded per lane [66] |
| Smearing | Differential glycosylation; DNA contamination; Excessive reducing agent | Treat samples with PNGase F to remove N-glycans; Shear genomic DNA to reduce viscosity; Ensure final concentration of DTT <50 mM [65] [66] |
Essential Methodologies for Ubiquitination Validation
Immunoprecipitation Combined with Western Blot
Table: Key Reagents for Ubiquitin Immunoprecipitation
| Reagent Category | Specific Examples | Function & Application Notes |
|---|---|---|
| Affinity Tags | 6xHis, Strep-tag, FLAG, HA | Enable purification of ubiquitinated proteins; His-tag requires Ni-NTA agarose, may co-purify histidine-rich proteins [60] [63] |
| Ubiquitin Traps | ChromoTek Ubiquitin-Trap (Agarose/Magnetic) | Nanobody-based reagents for pulldown of mono/poly-ubiquitin and ubiquitinated proteins from various species [62] |
| Proteasome Inhibitors | MG-132 | Stabilizes ubiquitinated proteins by blocking proteasomal degradation; use 5-25 μM for 1-2 hours before harvesting [61] [62] |
| Linkage-specific Antibodies | K48-linkage specific, K63-linkage specific | Detect specific polyubiquitin chain architectures; useful for determining ubiquitin signaling outcomes [63] |
The following diagram illustrates the core workflow for detecting protein ubiquitination using immunoprecipitation and Western blot:
Detailed Protocol:
- Cell Preparation and Lysis: Culture cells to 80-90% confluency. Pre-treat with 5-25 μM MG-132 proteasome inhibitor for 1-2 hours before harvesting to stabilize ubiquitinated proteins [61] [62]. Lyse cells using RIPA buffer or denaturing buffer (e.g., containing 8M urea) supplemented with fresh protease inhibitors (e.g., PMSF, leupeptin) and phosphatase inhibitors if studying phosphorylated proteins [66]. Sonicate samples (3 × 10-second bursts at 15W on ice) to ensure complete lysis and shear genomic DNA [66].
Immunoprecipitation: Pre-clear cell lysates by centrifugation at 70,000 × g for 30 minutes [60]. Incubate supernatant with primary antibody (2-10 μg) specific to your target protein or ubiquitin overnight at 4°C with rotation [68]. Add appropriate beads (protein A/G agarose or magnetic beads) and incubate for an additional 1 hour to overnight [68] [69]. For tagged ubiquitin approaches, use Ni-NTA agarose for His-tagged ubiquitin or Strep-Tactin for Strep-tagged ubiquitin [63].
Washing and Elution: Wash beads 3-4 times with 1 mL ice-cold lysis or wash buffer containing 0.05% Tween-20 to reduce non-specific binding [68] [67]. For Western blot analysis, elute proteins by heating beads in 2× SDS sample buffer containing 2-mercaptoethanol at 95°C for 5 minutes [68].
Western Blot Analysis: Resolve proteins on 6-12% gradient SDS-PAGE gels to maximize resolution of high molecular weight species [60]. Transfer to nitrocellulose or PVDF membranes using wet transfer systems (70V for 2-4 hours at 4°C). For high molecular weight proteins (>100 kDa), reduce methanol content to 5-10% in transfer buffer and extend transfer time [66]. Block membranes with 5% BSA or non-fat dry milk in TBS with 0.1% Tween-20 [66]. Incubate with primary antibodies diluted in appropriate buffer overnight at 4°C, followed by HRP-conjugated secondary antibodies. Detect using enhanced chemiluminescence substrates, optimizing exposure time to avoid over-exposure [65] [67].
Mass Spectrometry-Based Validation Approaches
The following diagram illustrates the mass spectrometry workflow for ubiquitination site mapping:
Detailed Protocol:
- Sample Preparation and Digestion: Enrich ubiquitinated proteins using immunoprecipitation with anti-ubiquitin antibodies, Ubiquitin-Traps, or tagged ubiquitin approaches as described above [63] [62]. Reduce proteins with 10 mM DTT and alkylate with 50 mM iodoacetamide [60]. Digest with trypsin overnight at 37°C, which generates the characteristic di-glycine remnant on modified lysines with a mass shift of 114.0429 Da [60] [63].
Chromatographic Separation: For complex samples, use either GeLC-MS/MS (separating proteins by SDS-PAGE before excising bands and digesting) or multi-dimensional chromatography such as MUDPIT (multidimensional protein identification technology) [64]. These separation methods reduce sample complexity and increase coverage of ubiquitinated peptides.
Mass Spectrometry Analysis: Analyze peptides using liquid chromatography coupled to tandem mass spectrometry (LC-MS/MS). High-mass-accuracy instruments like Orbitrap systems are preferred [60] [64]. Program the mass spectrometer to perform data-dependent acquisition, automatically selecting the most abundant ions for fragmentation.
Data Analysis: Search MS/MS spectra against appropriate protein databases using algorithms like SEQUEST, including ubiquitination (+114.0429 Da on lysine) as a variable modification [60]. Use mass accuracy filters (e.g., 15 ppm for high-resolution instruments) and apply strict false discovery rate thresholds (e.g., <1%) [60]. Manually verify spectra, particularly for peptides with multiple lysine residues where ubiquitination site assignment can be ambiguous [60].
Virtual Western Blot Approach
This computational method validates ubiquitination by reconstructing molecular weight information from geLC-MS/MS data:
Experimental Molecular Weight Calculation: After geLC-MS/MS analysis, compute the experimental molecular weight of putative ubiquitin conjugates using the value and distribution of spectral counts in the gel via Gaussian curve fitting [60].
Threshold Application: Apply multiple thresholds that incorporate the mass of ubiquitin (∼8 kDa for monoubiquitination) and experimental variations. Only accept candidates showing significant molecular weight increases consistent with ubiquitination [60].
False Discovery Rate Estimation: Compare accepted conjugates with control samples to estimate false discovery rates. In original implementations, this approach accepted only ∼30% of candidate ubiquitin-conjugates despite denaturing purification, with an estimated false discovery rate of ∼8% [60].
Successful validation of protein ubiquitination requires careful experimental design, appropriate controls, and often multiple complementary techniques. The methodologies detailed here—immunoprecipitation combined with Western blotting, mass spectrometry-based site mapping, and virtual Western blot analysis—provide robust frameworks for confirming ubiquitination while minimizing background and artifacts. By following these protocols and implementing the troubleshooting recommendations, researchers can generate reliable, reproducible data that advances our understanding of ubiquitin-mediated cellular regulation.
Immunoprecipitation of ubiquitinated proteins is fundamental for studying the ubiquitin-proteasome system, yet researchers consistently face challenges with high background noise and poor specificity. The transient nature of ubiquitination, where polyubiquitin chains are rapidly removed by deubiquitinating enzymes (DUBs) or targeted for proteasomal degradation, complicates the accurate capture of endogenous ubiquitination events [70]. Traditional anti-ubiquitin antibody approaches, while widely used, often suffer from limited specificity, cross-reactivity with ubiquitin-like proteins, and an inability to preserve labile ubiquitination states during sample processing [34] [71]. The trypsin-resistant tandem ubiquitin-binding entity (TR-TUBE) technology was developed specifically to address these limitations by providing high-affinity ubiquitin chain binding while protecting ubiquitinated substrates from cellular deubiquitination machinery [70] [34]. This technical support document provides a comparative analysis of these methodologies, with specific troubleshooting guidance for reducing background in ubiquitin immunoprecipitation experiments.
Traditional Anti-Ubiquitin Antibody Approaches
Traditional anti-ubiquitin antibodies typically target specific ubiquitin epitopes, including the ubiquitin remnant motif Lys-ε-Gly-Gly (diGly) that remains after tryptic digestion [70]. These antibodies operate through several mechanisms:
- diGly remnant antibodies: Recognize the characteristic Gly-Gly signature left on ubiquitinated lysine residues after trypsin digestion, enabling mass spectrometry-based ubiquitinome profiling [34]
- Linkage-specific antibodies: Target specific ubiquitin chain linkages (K48, K63, etc.), though with varying specificity and cross-reactivity [71]
- Conventional immunoprecipitation workflows: Employ antibody-bead complexes to pull down ubiquitinated proteins from cell lysates [25]
These methods face inherent limitations due to the dynamic nature of ubiquitination and competition from endogenous ubiquitin-binding proteins, often resulting in suboptimal enrichment of low-abundance ubiquitinated substrates [70] [34].
TR-TUBE Technology Fundamentals
TR-TUBE represents a significant advancement in ubiquitin enrichment technology through its unique mechanism of action:
- High-affinity ubiquitin binding: Comprises multiple tandem ubiquitin-associated (UBA) domains that bind polyubiquitin chains with nanomolar affinity [34]
- Trypsin resistance: Engineered with arginine-to-alanine substitutions to resist tryptic digestion, enabling compatibility with mass spectrometry workflows [70] [72]
- Pan-linkage recognition: Binds all eight ubiquitin chain linkage types (M1, K6, K11, K27, K29, K33, K48, and K63) [70]
- Protective function: Shields polyubiquitin chains from DUBs and inhibits proteasomal degradation, stabilizing transient ubiquitination events [34]
Table 1: Key Characteristics of Ubiquitin Enrichment Tools
| Feature | Traditional Anti-Ubiquitin Antibodies | TR-TUBE |
|---|---|---|
| Mechanism of Action | Epitope recognition | High-affinity ubiquitin chain binding |
| Trypsin Compatibility | Limited (except diGly antibodies) | Yes (trypsin-resistant by design) |
| DUB Protection | No | Yes |
| Linkage Coverage | Varies by antibody specificity | Pan-linkage recognition |
| Background Concerns | Higher due to non-specific binding | Lower due to specific ubiquitin chain affinity |
| Stabilization of Ubiquitination | No | Yes |
Technical Comparison: Performance Metrics
Quantitative Performance Data
Direct comparison of TR-TUBE and antibody-based methods reveals significant differences in performance characteristics:
Table 2: Quantitative Performance Comparison of Ubiquitin Enrichment Methods
| Performance Metric | Anti-Ubiquitin Antibodies | diGly Antibodies | TR-TUBE |
|---|---|---|---|
| Ubiquitination Site Identification | Limited by antibody specificity | ~20,000+ sites possible (with limitations) | Significantly enhanced identification of E3-specific substrates [34] |
| Detection Sensitivity for Endogenous Substrates | Low to moderate | Moderate | High (enables detection without proteasome inhibition) [34] |
| Background Interference | High (due to non-specific binding) | Moderate (sequence recognition bias) | Low (specific ubiquitin chain binding) [73] |
| Protection Efficiency from DUBs | None | None | >90% for major linkage types [72] |
| E3 Ligase Activity Detection | Indirect, requires inhibition | Challenging to attribute to specific E3s | Direct detection of specific E3 activity [70] |
Experimental Workflow Comparison
Troubleshooting Guide: Reducing Background Interference
Common Experimental Issues and Solutions
Table 3: Troubleshooting Guide for Ubiquitin Immunoprecipitation
| Problem | Potential Causes | TR-TUBE Solutions | Traditional Antibody Solutions |
|---|---|---|---|
| High Background | Non-specific antibody binding | Use stringent washes with high salt (500mM NaCl) and detergents [73] | Pre-clear lysate; optimize antibody concentration |
| Low Signal/Weak Detection | Transient ubiquitination; DUB activity | Express TR-TUBE in cells to stabilize ubiquitination before lysis [70] | Increase proteasome inhibitor concentration; shorten processing time |
| Incomplete Ubiquitin Chain Protection | Insufficient TR-TUBE binding | Increase TR-TUBE concentration; ensure proper folding | Not applicable |
| Non-specific Band Interference | Antibody heavy/light chains co-migration | Use Fab fragments or nanobodies to reduce interfering bands [73] | Change electrophoresis conditions; use different secondary detection |
| Poor Mass Spectrometry Compatibility | Trypsin-sensitive enrichment reagents | Use trypsin-resistant TR-TUBE design [72] | Use diGly antibody enrichment after trypsinization |
Optimized Protocol for TR-TUBE Implementation
TR-TUBE Ubiquitin Enrichment Protocol (3-Day Procedure)
Day 1: Cell Transfection
- Plate HEK293T cells (or relevant cell line) at 60-70% confluence in 10cm dishes
- Transfect with FLAG-tagged TR-TUBE plasmid (2μg) and E3 ligase plasmid (2μg) using preferred transfection reagent
- Include controls: TR-TUBE alone, E3 ligase alone, and ubiquitin-binding deficient TR-TUBE mutant
Day 2: Cell Harvest and Lysis
- Harvest cells 36-48 hours post-transfection by gentle scraping
- Lyse cells in HEPES-Triton buffer (20mM HEPES pH7.4, 1% Triton X-100, 150mM NaCl) supplemented with:
- 1mM N-ethylmaleimide (DUB inhibitor)
- 10μM MG132 (proteasome inhibitor)
- Complete protease inhibitor cocktail
- Clarify lysates by centrifugation at 16,000 × g for 15 minutes at 4°C
Day 2: TR-TUBE Immunoprecipitation
- Incubate clarified lysate with anti-FLAG M2 affinity gel (25μL bed volume) for 2 hours at 4°C with rotation
- Wash beads extensively with:
- Wash 1: Lysis buffer (3 times)
- Wash 2: Lysis buffer with 500mM NaCl (high stringency)
- Wash 3: Lysis buffer with 0.1% SDS (additional stringency)
- Elute bound proteins with 2× SDS sample buffer or FLAG peptide (150μg/mL) for downstream applications
Day 3: Analysis
- Perform Western blotting with appropriate antibodies
- For mass spectrometry, process samples with trypsin digestion and analyze diGly-modified peptides [70] [34]
Frequently Asked Questions (FAQ)
Q1: Can TR-TUBE be used for endogenous ubiquitination studies without overexpression?
Yes, TR-TUBE can stabilize and capture endogenous ubiquitinated proteins without requiring substrate overexpression. However, co-expression with specific E3 ligases enhances the detection of pathway-specific ubiquitination events [34].
Q2: How does TR-TUBE compare to traditional methods for detecting specific E3 ligase activity?
TR-TUBE provides superior detection of specific E3 ligase activity. In comparative studies, TR-TUBE expression enabled clear detection of Skp2-mediated p27 ubiquitination, while conventional ubiquitin overexpression methods showed minimal detection above background [70].
Q3: What are the optimal wash conditions to minimize background with TR-TUBE?
TR-TUBE tolerates high-stringency wash conditions including:
- High salt concentrations (up to 500mM NaCl)
- Various detergents (Triton X-100, NP-40, CHAPS)
- Mild denaturants (0.1% SDS) These conditions significantly reduce non-specific binding while maintaining specific ubiquitinated substrate interactions [73].
Q4: Can TR-TUBE be combined with diGly antibody approaches?
Yes, this combination provides powerful synergistic benefits. TR-TUBE stabilizes and enriches ubiquitinated proteins in cells, while subsequent diGly antibody enrichment of tryptic peptides enables comprehensive ubiquitination site mapping by mass spectrometry [70] [34].
Q5: How does TR-TUBE address the problem of transient ubiquitination?
TR-TUBE directly stabilizes ubiquitination by masking polyubiquitin chains from deubiquitinating enzymes (DUBs). This protective function maintains ubiquitination states that would otherwise be lost during sample processing [34].
Research Reagent Solutions
Table 4: Essential Reagents for Ubiquitin Enrichment Experiments
| Reagent | Function | Application Notes |
|---|---|---|
| TR-TUBE Plasmids | Eukaryotic expression of trypsin-resistant TUBE | Available with FLAG, HA, or other tags for purification [70] |
| Proteasome Inhibitors (MG132) | Prevent degradation of ubiquitinated proteins | Use at 10-20μM for 4-6 hours before harvesting [34] |
| DUB Inhibitors (N-ethylmaleimide) | Preserve ubiquitin chains during processing | Include in all lysis and wash buffers at 1-5mM [21] |
| Linkage-Specific Antibodies | Detect specific ubiquitin chain types | Validate for specificity; high batch-to-batch variability |
| Anti-diGly Antibodies | Enrich ubiquitinated peptides for MS | Essential for ubiquitin site identification; shows sequence bias [74] |
| Fab Fragments/Nanobodies | Reduce antibody-derived background | Ideal for MS applications; minimal interfering bands [73] |
The comparative analysis demonstrates that TR-TUBE technology provides significant advantages over traditional anti-ubiquitin antibody approaches for reducing background in ubiquitin immunoprecipitation experiments. The key benefits include superior stabilization of labile ubiquitination events, pan-linkage recognition, compatibility with mass spectrometry workflows, and enhanced detection of specific E3 ligase activities. For researchers pursuing ubiquitination studies, particularly those focused on identifying novel E3 substrates or working with low-abundance ubiquitination events, TR-TUBE offers a robust solution to the persistent challenge of background reduction. The implementation of optimized protocols and troubleshooting guidelines presented in this technical support document will enable researchers to maximize data quality while minimizing experimental artifacts in ubiquitin enrichment experiments.
Troubleshooting Guides
Low or No Signal in Ubiquitin Immunoprecipitation
| Problem | Possible Causes | Recommendations |
|---|---|---|
| Low/No Signal | Inadequate DUB inhibition leading to deubiquitylation [75] | Use higher concentrations (up to 50-100 mM) of NEM or IAA in lysis buffer [75]. Prefer NEM for mass spectrometry compatibility [75]. |
| Target protein degradation by the proteasome [75] [76] | Treat cells with a proteasome inhibitor (e.g., MG132) prior to lysis. Note: prolonged incubation (>12h) can cause cytotoxic effects [75]. | |
| Use of denaturing lysis buffer disrupting protein interactions [77] | For Co-IP, use mild, non-denaturing lysis buffers (e.g., Cell Lysis Buffer #9803) instead of strong buffers like RIPA [77]. Ensure sonication for nuclear/membrane protein extraction [77]. | |
| Low expression of the target or its modified form [77] | Include an input lysate control. Use expression profiling tools and scientific literature to verify protein expression in your model system [77]. |
Multiple Bands or High Background
| Problem | Possible Causes | Recommendations |
|---|---|---|
| Multiple Bands / High Background | Non-specific binding to beads or antibody [77] | Include a bead-only control and an isotype control (antibody from same host but non-specific target) [77]. Pre-clear lysate if needed [77]. |
| Endogenous ubiquitin smearing due to polyubiquitylation [75] [76] | This is often the expected signal. Use linkage-specific ubiquitin antibodies or DUBs to confirm chain topology [75]. | |
| Signal obscured by IgG heavy/light chains [77] | Use antibodies from different species for IP and western blot. Alternatively, use a biotinylated detection antibody with Streptavidin-HRP [77]. |
Frequently Asked Questions (FAQs)
General Experimental Questions
Q1: What are the most critical steps to preserve the ubiquitination state of my protein during cell lysis? The most critical steps are the rapid inhibition of Deubiquitylases (DUBs) and the proteasome.
- DUB Inhibition: Add high concentrations (up to 50-100 mM) of alkylating agents like N-Ethylmaleimide (NEM) or Iodoacetamide (IAA) to your lysis buffer to irreversibly inhibit DUBs. NEM is often more effective for preserving K63- and M1-linked chains and is preferred for subsequent mass spectrometry [75].
- Proteasome Inhibition: Treat cells with a proteasome inhibitor like MG132 before lysis to prevent the degradation of polyubiquitylated proteins, allowing them to accumulate and be detected [75] [76].
Q2: My protein of interest (POI) runs as a high molecular weight smear on a western blot. Is this normal? Yes, for a ubiquitylated protein, this is often the expected result. A heterogeneous smear represents the POI conjugated to polyubiquitin chains of varying lengths [75]. To confirm this smear is due to ubiquitin, you can:
- Probe the membrane with an anti-ubiquitin antibody [76] [78].
- Treat your immunoprecipitated sample with a deubiquitylase (DUB) enzyme; this should collapse the smear into a discrete band corresponding to the non-ubiquitylated POI [75].
Q3: How can I distinguish if my protein is modified by a specific type of ubiquitin chain? To determine chain linkage, combine the use of linkage-specific ubiquitin-binding domains (UBDs) and linkage-specific deubiquitylases (DUBs) [75].
- Linkage-specific Antibodies: Many antibodies are available that recognize specific ubiquitin linkages (e.g., K48-only, K63-only).
- DUB Treatment: Incubate your sample with a linkage-specific DUB (e.g., OTUB1 for K48-linked chains). If the ubiquitin signal on your POI is removed, it confirms the presence of that specific chain type [75].
Immunoprecipitation-Specific Questions
Q4: What are the best controls for a ubiquitin immunoprecipitation (IP) experiment? Proper controls are essential for interpreting your IP results [77] [42].
- Input Lysate: Confirms the presence of your target protein in the starting material.
- Bead-Only Control: Accounts for proteins that bind non-specifically to the beads.
- Isotype Control: Uses a non-specific antibody from the same host species as your IP antibody. Any bands present in your experimental sample but absent in this control are specific.
- Positive Control: A cell lysate from a known context where your POI is ubiquitylated (e.g., after specific stimulation or proteasome inhibition).
Q5: How do I choose between Protein A and Protein G beads for my IP? The choice depends on the host species of your antibody [77] [42].
- Protein A has a higher affinity for rabbit IgG.
- Protein G has a higher affinity for mouse IgG. For the highest binding efficiency, use Protein A beads with rabbit antibodies and Protein G beads with mouse antibodies [77]. Combination Protein A/G beads can also be a helpful option.
Key Reagent Concentrations for Ubiquitination Assays
| Reagent | Function | Recommended Concentration / Usage | Key Considerations |
|---|---|---|---|
| NEM (N-Ethylmaleimide) | DUB inhibitor; alkylates active site cysteine [75] | 5 - 100 mM in lysis buffer [75] | More stable than IAA; better for preserving K63/M1 chains; preferred for MS [75]. |
| IAA (Iodoacetamide) | DUB inhibitor; alkylates active site cysteine [75] | 5 - 100 mM in lysis buffer [75] | Destroyed by light quickly; its adduct can interfere with MS-based ubiquitylation site mapping [75]. |
| MG132 | Proteasome inhibitor [75] [76] | Varies by cell type (e.g., 10-20 µM for several hours) [75] | Prevents degradation of polyubiquitylated proteins. Avoid prolonged treatment (>12h) due to cytotoxicity [75]. |
| EDTA/EGTA | Chelates metal ions; inhibits metalloproteinase DUBs [75] | Standard concentration (e.g., 1-5 mM) in lysis buffer [75] | Should be used in conjunction with NEM or IAA for complete DUB inhibition [75]. |
SDS-PAGE Conditions for Resolving Ubiquitin Chains
| Gel / Buffer Type | Optimal Separation Range | Key Application |
|---|---|---|
| MES Buffer [75] | Improved resolution of small ubiquitin oligomers (2-5 ubiquitins) [75] | Differentiating short-chain ubiquitination. |
| MOPS Buffer [75] | Improved resolution of longer polyubiquitin chains (≥8 ubiquitins) [75] | Analyzing extensive polyubiquitylation. |
| Tris-Acetate (TA) Buffer [75] | Superior for proteins in the 40-400 kDa range [75] | Ideal for resolving large ubiquitylated proteins. |
| Tris-Glycine (TG) Buffer, 8% gel [75] | Can separate ubiquitin chains up to 20 ubiquitins long [75] | General purpose analysis of polyubiquitylation. |
Experimental Protocols
Protocol 1: Basic Immunoprecipitation to Detect Protein Ubiquitylation
This protocol is used to determine if a specific protein is ubiquitylated [78].
Key Reagents:
- Lysis Buffer (e.g., Cell Lysis Buffer #9803 [77]) supplemented with 50-100 mM NEM and 5 mM EDTA [75].
- Protein A or G Magnetic Beads (selected based on antibody host species [77] [42]).
- Antibody against your Protein of Interest (POI) [78].
- Phosphate-Buffered Saline (PBS).
- Wash Buffer (e.g., lysis buffer without inhibitors).
- 2X Laemmli Sample Buffer.
Procedure:
- Cell Lysis: Lyse cells in supplemented, ice-cold lysis buffer. Keep samples on ice throughout. Sonicate briefly to shear DNA and disrupt nuclei [77].
- Pre-clearing (Optional): Incubate the cell lysate with beads alone for 30-60 minutes at 4°C to remove proteins that bind non-specifically to the beads [77].
- Antibody-Bead Incubation: Incubate the antibody with the beads for 1-2 hours at 4°C to allow the antibody to bind.
- Immunoprecipitation: Incubate the antibody-bound beads with the pre-cleared lysate for 2-4 hours or overnight at 4°C with gentle agitation.
- Washing: Pellet the beads and carefully remove the supernatant. Wash the beads 3-4 times with 1 mL of ice-cold Wash Buffer.
- Elution: Resuspend the beads in 2X Laemmli Sample Buffer. Boil the samples for 5-10 minutes to elute the immunoprecipitated proteins.
- Analysis: Load the supernatant onto an SDS-PAGE gel for western blot analysis. Probe the membrane with an anti-ubiquitin antibody to detect ubiquitylation of the POI [76] [78].
Protocol 2: Validating Ubiquitin Chain Linkage Using Deubiquitylases (DUBs)
This protocol is used to confirm the topology of the ubiquitin chains attached to your protein [75].
Key Reagents:
- Immunoprecipitated protein on beads (from Protocol 1).
- Appropriate reaction buffer for the DUB (usually provided by the manufacturer).
- Linkage-specific deubiquitylase (DUB) (e.g., OTUB1 for K48-linked chains, AMSH for K63-linked chains).
- Control: Reaction buffer without DUB.
Procedure:
- Split Sample: After the final wash in Protocol 1, split the bead slurry into two equal aliquots.
- DUB Reaction: Resuspend one aliquot in reaction buffer containing the linkage-specific DUB. Resuspend the other (control) aliquot in reaction buffer alone.
- Incubate: Incubate both samples for 1-2 hours at 37°C with gentle agitation.
- Stop Reaction: Add Laemmli Sample Buffer and boil for 5 minutes.
- Analysis: Perform western blot analysis. Probe for ubiquitin first.
- Interpretation: If the ubiquitin smear on your POI is eliminated or reduced in the DUB-treated sample but remains in the control, it confirms the presence of the specific ubiquitin linkage that the DUB cleaves [75].
The Scientist's Toolkit: Research Reagent Solutions
| Item | Function | Key Considerations |
|---|---|---|
| DUB Inhibitors (NEM, IAA) | Preserve the endogenous ubiquitination state by inhibiting deubiquitylating enzymes during cell lysis [75]. | NEM is more stable and MS-compatible. High concentrations (up to 100 mM) may be needed [75]. |
| Proteasome Inhibitors (MG132) | Allow accumulation of polyubiquitylated proteins by blocking their degradation [75] [76]. | Use for a limited time to avoid stress-induced ubiquitination from cytotoxicity [75]. |
| Tandem-repeated Ubiquitin-Binding Entities (TUBEs) | Reagents with high affinity for polyubiquitin chains; used to pull down ubiquitylated proteins, protecting them from DUBs and proteasomal degradation during isolation [75]. | Useful for enriching low-abundance ubiquitylated species. |
| Linkage-Specific Ubiquitin Antibodies | Detect specific types of ubiquitin chain linkages (e.g., K48, K63, M1) via western blot [75]. | Specificity must be validated. Results should be corroborated with other methods like DUB treatment [75]. |
| Linkage-Specific Deubiquitylases (DUBs) | Enzymatically cleave specific ubiquitin linkages; used as a tool to confirm chain topology [75]. | Provides functional validation of chain type beyond antibody detection. |
Technical Support Center
Troubleshooting Guides
Guide 1: Troubleshooting Low Signal in Ubiquitin Immunoprecipitation
Problem: Low or No Signal in Western Blot
| Possible Cause | Discussion & Mechanism | Recommended Solution |
|---|---|---|
| Stringent Lysis Conditions | Strong denaturing buffers (e.g., RIPA with sodium deoxycholate) can disrupt protein-protein interactions and native ubiquitin conjugates [79]. | Use a milder cell lysis buffer (e.g., Cell Lysis Buffer #9803) for Co-IP experiments. Ensure sonication for nuclear rupture and optimal protein recovery [79]. |
| Low Abundance of Ubiquitinated Proteins | Ubiquitination is transient and reversible; ubiquitinated proteins often represent a very small fraction of the total cellular proteome [80]. | Treat cells with proteasome inhibitors (e.g., 5-25 µM MG-132 for 1–2 hours) prior to harvesting to preserve ubiquitination signals. Validate with a known positive control [79] [80]. |
| Epitope Masking | The antibody's binding site on the target ubiquitinated protein may be obscured by the protein's conformation or interacting partners [79]. | Use an antibody that recognizes a different epitope region. For ubiquitin itself, consider high-affinity nanobody-based traps (e.g., Ubiquitin-Trap) designed to capture various ubiquitin forms [80]. |
| Low IgG Binding to Beads | Inefficient binding of the host species antibody to the beads used for precipitation [79]. | Optimize bead choice: use Protein A beads for rabbit antibodies and Protein G beads for mouse antibodies, as they have higher affinity for these respective IgGs [79] [42]. |
Problem: High Background or Non-Specific Bands
| Possible Cause | Discussion & Mechanism | Recommended Solution |
|---|---|---|
| Non-Specific Binding to Beads | Off-target proteins bind directly to the beads or the IgG of the immunoprecipitating antibody [79]. | Include a bead-only control (no antibody) and an isotype control. If background is high in these controls, pre-clear the lysate by incubating with beads alone before the IP [79]. |
| Detection of IgG Heavy/Light Chains | The denatured heavy (~50 kDa) and light (~25 kDa) chains of the IP antibody are detected by the secondary antibody in the western blot, obscuring targets of similar size [79]. | Use antibodies from different host species for the IP and western blot (e.g., rabbit for IP, mouse for blot). Alternatively, use a biotinylated detection antibody with Streptavidin-HRP [79]. |
| Multiple Ubiquitin Conjugates | Proteins can be modified with mono-ubiquitin or polyubiquitin chains of varying lengths, resulting in a characteristic "smear" on the blot, which is often a true signal [80]. | This is often expected. To confirm, use linkage-specific ubiquitin antibodies to determine which chain types are present [80]. |
Frequently Asked Questions (FAQs)
Q1: Why does my ubiquitin blot look like a smear instead of a distinct band? A: A smear is a typical and often expected result in ubiquitin immunoblots. It indicates that your target protein exists in multiple states modified by ubiquitin chains of different lengths (monoubiquitination, short chains, long polymers) [80]. This heterogeneity in molecular weight appears as a smear or ladder on the gel.
Q2: How can I increase the amount of ubiquitinated protein in my samples before IP? A: To preserve and enrich for ubiquitinated proteins, treat your cells with a proteasome inhibitor such as MG-132 before harvesting. A standard starting point is incubation with 5-25 µM MG-132 for 1–2 hours. Note that overexposure can cause cytotoxicity, so conditions may require optimization for your specific cell type [80].
Q3: My Co-IP failed to detect a known interaction. What steps can I take to optimize my lysis buffer conditions? A: The lysis buffer is critical. Avoid strong denaturing buffers like RIPA for Co-IP experiments. Start with a milder, non-denaturing or weakly-denaturing cell lysis buffer. Ensure your buffer contains essential protease and phosphatase inhibitors to maintain protein modifications. Always include an input lysate control (a sample of your total lysate) to verify that both your target and interacting proteins are present and detectable [79].
Q4: Can I differentiate between different types of ubiquitin chain linkages (e.g., K48 vs. K63) in my IP experiment? A: Standard ubiquitin IP reagents, like the Ubiquitin-Trap, are not linkage-specific and will pull down all ubiquitin forms [80]. To differentiate, you must follow the IP with a western blot using linkage-specific ubiquitin antibodies (e.g., anti-K48-linkage specific or anti-K63-linkage specific). Alternatively, you can use catalytic domains of ubiquitin-binding proteins or linkage-specific deubiquitylases (DUBs) to interrogate chain topology [81].
The Scientist's Toolkit: Key Research Reagent Solutions
The following table details essential reagents for rigorous ubiquitination research, particularly in disease models.
| Item | Function & Application | Example & Notes |
|---|---|---|
| Ubiquitin-Trap (Agarose/Magnetic) | High-affinity nanobody-based reagent for pulldown of mono-ubiquitin, ubiquitin chains, and ubiquitinylated proteins from various cell extracts. Ideal for low-abundance target enrichment [80]. | ChromoTek product; useful for IP-MS workflows. Not linkage-specific. |
| Proteasome Inhibitor (MG-132) | Reversibly inhibits the 26S proteasome, preventing the degradation of ubiquitinated proteins and thereby increasing their steady-state levels in the cell for detection [80]. | Used pre-harvest (5-25 µM for 1-2 hrs). Optimize for cell type to avoid cytotoxicity. |
| Linkage-Specific Ubiquitin Antibodies | Western blot antibodies that specifically recognize polyubiquitin chains linked through a particular lysine residue (e.g., K48, K63), allowing determination of chain topology and function [80]. | Essential after a general ubiquitin IP to decipher the biological signal (e.g., K48 for degradation). |
| Cell Lysis Buffer #9803 | A mild, non-denaturing lysis buffer recommended for Co-IP and IP experiments where preserving protein-protein interactions is critical [79]. | Preferred over RIPA buffer for interaction studies. |
| Phosphatase/Protease Inhibitor Cocktails | Added to lysis buffers to preserve post-translational modifications (PTMs) like phosphorylation and prevent protein degradation during sample preparation [79]. | Crucial for maintaining the integrity of ubiquitination signals and other PTMs. |
Experimental Protocols & Data Presentation
Validated Ubiquitination-Related Biomarkers in Cervical Cancer [82]
The following biomarkers were identified through differential expression analysis of self-sequenced and TCGA-GTEx-CESC datasets, followed by univariate Cox and LASSO regression analysis.
| Biomarker Gene | Expression in Tumor | Association/Function |
|---|---|---|
| MMP1 | Upregulated | Validated by RT-qPCR. Associated with patient survival in a risk model. |
| RNF2 | Not specified | E3 ubiquitin ligase; identified as a key prognostic biomarker. |
| TFRC | Upregulated | Validated by RT-qPCR. Associated with patient survival in a risk model. |
| SPP1 | Not specified | Identified as a key prognostic biomarker. |
| CXCL8 | Upregulated | Validated by RT-qPCR. Associated with patient survival in a risk model. |
Protocol: Key Steps for Optimizing Ubiquitin Immunoblotting [81]
- Sample Preparation: Keep cells or tissues on ice. Use appropriate lysis buffer (e.g., non-denaturing for Co-IP). Include fresh protease and phosphatase inhibitors.
- Inhibition: Treat cells with a proteasome inhibitor (e.g., MG-132) before harvesting to stabilize ubiquitinated proteins.
- Lysate Preparation: Perform sonication to ensure complete cell disruption, shear DNA, and maximize protein recovery, especially for nuclear and membrane proteins.
- Immunoprecipitation: Use a high-affinity capture reagent (e.g., specific antibody or Ubiquitin-Trap). Include critical controls: input lysate, bead-only, and isotype control.
- Washing and Elution: Use stringent wash conditions to reduce background while maintaining specific interactions.
- Detection (Western Blot): Use linkage-specific antibodies to characterize ubiquitin chain topology. Be aware that smears are often biologically relevant.
Signaling Pathway and Experimental Workflow Diagrams
Conclusion
Reducing background in ubiquitin immunoprecipitation is not achieved by a single trick but through a holistic strategy that spans experimental design, meticulous execution, and rigorous validation. Mastering the fundamentals of controls and buffer systems, combined with the application of advanced tools like TUBEs, provides a powerful approach to isolate true ubiquitination signals from noise. As research continues to unravel the complexity of the ubiquitin code—including the roles of branched and linkage-specific chains—the demand for clean and specific IPs will only grow. Adopting the comprehensive framework outlined here will empower researchers to generate more reliable and interpretable data, accelerating discoveries in fundamental cell biology and the development of targeted therapies that exploit the ubiquitin-proteasome system.
References
- 1. Ubiquitin Detection by Immunoprecipitation Band [https://www.mtoz-biolabs.com/ubiquitin-detection-by-immunoprecipitation-band.html]
- 2. The principle and method of co-immunoprecipitation (Co-IP) [https://www.mblbio.com/bio/g/support/method/co-immunoprecipitation.html]
- 3. Co-immunoprecipitation (Co-IP): The Complete Guide [https://www.antibodies.com/applications/co-immunoprecipitation]
- 4. How to obtain a low background in immunoprecipitation ... [https://www.ptglab.com/news/blog/how-to-obtain-a-low-background-in-immunoprecipitation-assays/?srsltid=AfmBOord1q_SRfw6AGL-H1OWrjK0PWQNc2EU-kmjRqLGuzByU90AoO3A]
- 5. Immunoprecipitation Troubleshooting Guide [https://www.cellsignal.com/learn-and-support/troubleshooting/ip-troubleshooting-guide?srsltid=AfmBOop5WB38R12yKKGsT4sJ1pCMyo1UumWqZAofefwLw-b_EWQT--f8]
- 6. Immunoprecipitation Troubleshooting [https://www.antibodies.com/applications/immunoprecipitation/immunoprecipitation-troubleshooting]
- 7. Co-Immunoprecipitation (Co-IP) and Pull-Down [https://www.thermofisher.com/us/en/home/life-science/protein-biology/protein-assays-analysis/protein-interaction-analysis/co-immunoprecipitation-co-ip-pull-down.html]
- 8. - Non and Specific - Binding of ELISA: A Case Study... Cross Reaction [https://pmc.ncbi.nlm.nih.gov/articles/PMC8394222/]
- 9. How to choose and use antibodies | Abcam [https://www.abcam.com/en-us/technical-resources/guides/antibody-basics/how-to-choose-and-use-antibodies]
- 10. Immunoprecipitation Troubleshooting Guide [https://www.cellsignal.com/learn-and-support/troubleshooting/ip-troubleshooting-guide?srsltid=AfmBOooE7re3Uz3g2VMkXHfbwpxA-sGOzrn9VP-ROmmVo0TEVYwD3kEf]
- 11. Immunoprecipitation Experimental Design Tips [https://www.cellsignal.com/applications/immunoprecipitation/ip-experimental-design-tips?srsltid=AfmBOorAOKcxSE7ykyhCV4ZRl-f8kxgyBAyMxmXzxBBRQxgKbGxs62OV]
- 12. Why should I use an IgG control in my IP experiment? [https://www.cellsignal.com/learn-and-support/technical-support/why-should-i-use-an-igg-control-in-my-ip-experiment/000001243?srsltid=AfmBOooE-68POW0WOHk_jYRdvcP8ZVDmRk42LWOWkGIbp-ZFM-DxgsRq]
- 13. Considerations before starting your IP experiment [https://www.ptglab.com/support/immunoprecipitation-protocol/considerations-before-starting-your-ip-experiment/?srsltid=AfmBOopHJFDpfKtDfHfoqOZY_lgMKCXp5U_X1sYj0Dpe8A3-9YSl7jCA]
- 14. Utilizing a Comprehensive Immunoprecipitation ... [https://pmc.ncbi.nlm.nih.gov/articles/PMC5908451/]
- 15. Ubiquitin-Trap Agarose, Kit for Immunoprecipitation [https://www.ptglab.com/products/Ubiquitin-Trap-Agarose-Kit-utak.htm?srsltid=AfmBOopeW5i_kla0ofBDjDCnbGE16pSiihIUPZjs8xg0CtJJM_cKVtHu]
- 16. Ubiquitin chain conformation regulates recognition and ... [https://pmc.ncbi.nlm.nih.gov/articles/PMC3605796/]
- 17. K48- and K63-linked ubiquitin chain interactome reveals branch- and length-specific ubiquitin interactors - PMC [https://pmc.ncbi.nlm.nih.gov/articles/PMC11109483/]
- 18. UbiREAD deciphers proteasomal degradation code of ... [https://pmc.ncbi.nlm.nih.gov/articles/PMC7617769/]
- 19. Ubiquiton—An inducible, linkage-specific ... [https://pmc.ncbi.nlm.nih.gov/articles/PMC10804999/]
- 20. Localized K63 Ubiquitin Signaling Is Regulated by VCP/ ... [https://www.sciencedirect.com/science/article/pii/S1535947625000180]
- 21. An optimized protocol to detect protein ubiquitination and ... [https://www.sciencedirect.com/science/article/pii/S2666166723001570]
- 22. Immunoprecipitation Troubleshooting Guide [https://www.cellsignal.com/learn-and-support/troubleshooting/ip-troubleshooting-guide?srsltid=AfmBOop1GSMOmWV2FZVybrK1rOEc2J-lg2cTYdc_lUvfgfAtr2s-WMEt]
- 23. Immunoprecipitation and co-immunoprecipitation protocol [https://www.abcam.com/en-us/technical-resources/protocols/immunoprecipitation]
- 24. Why is my lysis buffer not working? 9 Lysis Buffer Issues [https://www.goldbio.com/blogs/articles/why-is-my-lysis-buffer-not-working-how-to-resolve-9-lysis-buffer-issues-that-might-be-holding-you-back?srsltid=AfmBOoqs_OdzR5SpM8vNS04_NN-pxX476czEALd7vspdWazHzbYArMHY]
- 25. Immunoprecipitation (IP): The Complete Guide [https://www.antibodies.com/applications/immunoprecipitation]
- 26. How to Better Study Ubiquitination [https://www.ptglab.com/news/blog/how-to-better-study-ubiquitination/?srsltid=AfmBOorYrmg7flvm3OvGdG71Lnup52ru-dEaaS6Jt_jchqY_-DxqpvAN]
- 27. Comparison of Antibody IgG Binding Proteins [https://www.thermofisher.com/us/en/home/life-science/antibodies/antibodies-learning-center/antibodies-resource-library/antibody-methods/comparison-antibody-igg-binding-proteins.html]
- 28. Comparison of immunomagnetic beads coated with protein ... [https://pubmed.ncbi.nlm.nih.gov/8409461/]
- 29. Immune Precipitation (IP/CoIP): Magnetic Beads Method vs ... [https://www.absin.net/article-1362.html]
- 30. Easily Handle IP and Co-IP with Protein A/G Aga - Yeasen [https://www.yeasenbio.com/blogs/protein/antibody-capture-tool-easily-handle-ip-and-co-ip-with-protein-a-g-agarose-and-magnetic-beads]
- 31. Immunoprecipitation Tips and Tricks [https://www.thermofisher.com/us/en/home/life-science/protein-biology/protein-assays-analysis/immunoprecipitation/immunoprecipitation-myths.html]
- 32. Immunoprecipitation with Magnetic Beads [https://www.thermofisher.com/us/en/home/life-science/protein-biology/protein-assays-analysis/immunoprecipitation.html/1000?open=faqs]
- 33. Tandem Ubiquitin Binding Entities (TUBEs) [https://lifesensors.com/our-technologies/tandem-ubiquitin-binding-entities-tubes/]
- 34. A comprehensive method for detecting ubiquitinated ... [https://pmc.ncbi.nlm.nih.gov/articles/PMC4403176/]
- 35. Immunoprecipitation Troubleshooting Guide [https://www.cellsignal.com/learn-and-support/troubleshooting/ip-troubleshooting-guide?srsltid=AfmBOopMrE0NAyzCGERC212z7VyL-ecmAXAzEENG0otnmsWNz6QL5frM]
- 36. Troubleshooting of Immunoprecipitation (IP) [https://www.antibody-creativebiolabs.com/troubleshooting-of-immunoprecipitation.htm]
- 37. Analysis of Western (IP- Blot ) Immunoprecipitation Western [https://www.sigmaaldrich.com/BE/en/technical-documents/technical-article/protein-biology/western-blotting/ip-western]
- 38. Protein Immunoprecipitation (IP), Co- ... [https://www.thermofisher.com/us/en/home/technical-resources/technical-reference-library/protein-purification-isolation-support-center/protein-ip-coip-pulldown-support/protein-ip-coip-pulldown-support-troubleshooting.html]
- 39. Western blot troubleshooting guide! [https://www.jacksonimmuno.com/secondary-antibody-resource/technical-tips/western-blot-trouble-shooting/]
- 40. Optimizing Chemiluminescent Western Blots [https://www.licorbio.com/support/contents/applications/western-blots/optimizing-chemiluminescent-western-blots.html]
- 41. Immunoprecipitation Troubleshooting Guide [https://www.cellsignal.com/learn-and-support/troubleshooting/ip-troubleshooting-guide?srsltid=AfmBOor1br6V0sxKs0flE_IpFF8NewbV73c6mH1alxfzudL7ek1Bq6bK]
- 42. Immunoprecipitation (IP) Protocols & Troubleshooting & ... [https://www.antibody-creativebiolabs.com/immunoprecipitation-protocols-troubleshooting-guide.htm]
- 43. Co-immunoprecipitation and semi-quantitative ... [https://pmc.ncbi.nlm.nih.gov/articles/PMC8264609/]
- 44. Current methodologies in protein ubiquitination ... [https://pmc.ncbi.nlm.nih.gov/articles/PMC9373315/]
- 45. How to Better Study Ubiquitination [https://www.ptglab.com/news/blog/how-to-better-study-ubiquitination/?srsltid=AfmBOootlFK7a-UnKOa_y56J0jAk40hxGpAfQ-tC9WAuc4Te9kSZa9hD]
- 46. How to obtain a low background in immunoprecipitation ... [https://www.ptglab.com/news/blog/how-to-obtain-a-low-background-in-immunoprecipitation-assays/?srsltid=AfmBOorUw0Z8xacymUuA_0siOL8TyYKDQ1_3c4o_9ox_Q3VRbZNWeWWW]
- 47. How to obtain a low background in immunoprecipitation ... [https://www.ptglab.com/news/blog/how-to-obtain-a-low-background-in-immunoprecipitation-assays/?srsltid=AfmBOoqy1FckLyDSUE8dejm-G6_xsr5yvxmrBP8bqr5AyAoTEUCbivaE]
- 48. Molecular basis for ubiquitin/Fubi cross-reactivity in USP16 ... [https://www.nature.com/articles/s41589-023-01388-1]
- 49. Immunoprecipitation Techniques: Purification of Proteins [https://www.jove.com/v/10502/immunoprecipitation-techniques-purification-of-proteins]
- 50. Immunoprecipitation Protocol (Magnetic Beads) [https://www.cellsignal.com/learn-and-support/protocols/protocol-ip-magnetic?srsltid=AfmBOorA5okZSSE68fHyneoHKjXiTjKEDv8_7Ws1VjsrzBExWXe_59LY]
- 51. Identification and characterization of nanobodies specific ... [https://www.sciencedirect.com/science/article/pii/S0021925825024159]
- 52. Co-immunoprecipitation (Co-IP) Troubleshooting [https://www.antibodies.com/applications/co-immunoprecipitation/co-ip-troubleshooting]
- 53. Co-immunoprecipitation troubleshooting, tips and tricks [https://www.ptglab.com/news/blog/co-immunoprecipitation-troubleshooting-tips-and-tricks/?srsltid=AfmBOoo_Bw1fpXgYnErtBEgpm9lgNr5hsgNvC2QaBRtZyjYQgV5oSrwp]
- 54. in Optimizing for Hybridization Assays... Stringency Wash Buffers [https://www.letstalkacademy.com/increasing-stringency-hybridization-buffers/]
- 55. Signal-to-noise ratio [https://en.wikipedia.org/wiki/Signal-to-noise_ratio]
- 56. Arrayit | WBA WBB WBC WB1 WB2 WB3 microarray stringency low... [https://arrayit.com/microarray-wash-buffers.html]
- 57. 5.3: Signal-to-Noise Enhancement [https://chem.libretexts.org/Bookshelves/Analytical_Chemistry/Instrumental_Analysis_(LibreTexts)/05%3A_Signals_and_Noise_(TBD)/5.03%3A_Signal-to-Noise_Enhancement]
- 58. Improving SNR and Determining Optimal Excitation Levels [https://www.ni.com/en/support/documentation/supplemental/21/making-accurate-strain-measurements-improving-snr-and-determining-optimal-excitation-levels.html?srsltid=AfmBOop0yaAqietozqusobJzZ7ntO7gx_vvIHnnxWbIjCkHF_NGhj2hs]
- 59. Decoding polyubiquitin regulation of KV7. 1 (KCNQ1) ... [https://www.nature.com/articles/s41467-025-60893-0]
- 60. Systematic approach for validating the ubiquitinated proteome [https://pmc.ncbi.nlm.nih.gov/articles/PMC2673951/]
- 61. An optimized protocol to detect protein ubiquitination and ... [https://pmc.ncbi.nlm.nih.gov/articles/PMC10050764/]
- 62. How to Better Study Ubiquitination [https://www.ptglab.com/news/blog/how-to-better-study-ubiquitination/?srsltid=AfmBOoqeyZOkoANXI5gtX0M2xTv0LWsVJ64McQIqqg8p5WBp-Kh7ZRGY]
- 63. Current methodologies in protein ubiquitination characterization [https://cellandbioscience.biomedcentral.com/articles/10.1186/s13578-022-00870-y]
- 64. Weighing in on Ubiquitin: The Expanding Role of Mass ... [https://pmc.ncbi.nlm.nih.gov/articles/PMC1224607/]
- 65. Western Blot Troubleshooting [https://www.thermofisher.com/us/en/home/life-science/protein-biology/protein-biology-learning-center/protein-gel-electrophoresis-information/western-blot-troubleshooting.html]
- 66. Western Blotting Troubleshooting Guide [https://www.cellsignal.com/learn-and-support/troubleshooting/western-blot-troubleshooting-guide?srsltid=AfmBOoqW1Irc34BSdtAULVPNQalu6o0Tl24mHimhADmn2kmRX9KMZRJQ]
- 67. Help! Why do my Western blots look terrible? [https://azurebiosystems.com/blog/help-why-do-my-western-blots-look-terrible/]
- 68. The principle and method of immunoprecipitation (IP) [https://www.mblbio.com/bio/g/support/method/immunoprecipitation.html]
- 69. How to Detect Protein Ubiquitination-IP [https://www.mtoz-biolabs.com/how-to-detect-protein-ubiquitination-ip.html]
- 70. Detection of ubiquitination activity and identification ... [https://www.sciencedirect.com/science/article/abs/pii/S0076687918305287]
- 71. Ubiquitination detection techniques - PMC - PubMed Central [https://pmc.ncbi.nlm.nih.gov/articles/PMC10625345/]
- 72. Ub-ProT reveals global length and composition of protein ... [https://www.nature.com/articles/s41467-018-02869-x]
- 73. Advantages and limitations of different antibody formats in ... [https://www.ptglab.com/news/blog/advantages-and-limitations-of-different-antibody-formats-in-immunoprecipitation/?srsltid=AfmBOorgUs_6uVus02LssgviG9uJBaygiFqPCcLfvpLToizZlqotFNMs]
- 74. Antibody-free approach for ubiquitination profiling by ... [https://pubmed.ncbi.nlm.nih.gov/36764771/]
- 75. Optimising methods for the preservation, capture and identification of ubiquitin chains and ubiquitylated proteins by immunoblotting - PMC [https://pmc.ncbi.nlm.nih.gov/articles/PMC4709362/]
- 76. Protein Degradation using the Ubiquitin-Proteasome ... [https://www.thermofisher.com/us/en/home/life-science/cell-analysis/cell-analysis-learning-center/protein-degradation-resource-center/protein-degradation-using-ubiquitin-proteasome-pathway.html]
- 77. Immunoprecipitation Troubleshooting Guide [https://www.cellsignal.com/learn-and-support/troubleshooting/ip-troubleshooting-guide?srsltid=AfmBOopsIIgrlqJmk1bE6Kw-JamfZCKrvSIbyvk43cIYYCC7HsTZ6Rgz]
- 78. Strategies to Detect Endogenous Ubiquitination of a Target Mammalian Protein - PubMed [https://pubmed.ncbi.nlm.nih.gov/27613032/]
- 79. Immunoprecipitation Troubleshooting Guide [https://www.cellsignal.com/learn-and-support/troubleshooting/ip-troubleshooting-guide?srsltid=AfmBOop4ZYt8O98MnxvtmIXwgupKnVqRb38gYQ2KQa_7WzPiIPPxvmhD]
- 80. How to Better Study Ubiquitination [https://www.ptglab.com/news/blog/how-to-better-study-ubiquitination/?srsltid=AfmBOoo8hX7whWOVE2ggjI6CLLUf-pMaqXgUh0tVO3iBIl1FYwkVLdGD]
- 81. Optimising methods for the preservation, capture and identification of... [https://pubmed.ncbi.nlm.nih.gov/26325464/]
- 82. Identification and validation of ubiquitination-related genes for ... [https://pmc.ncbi.nlm.nih.gov/articles/PMC12343280/]